
On the Road Again… Destination New Zealand


Travel and adventure are always on the table in my life. Discovering new places and learning new things is a passion that will never fade. While visiting different places is always fun, I also love living in a new place that’s different to what I’m used to. So far, I have the contrast of Canada and Japan, but now we’re throwing New Zealand into the mix!
I’ll share with you my experiences and artistic discoveries from in and around New Zealand. Hopefully while we’re here, we’ll be able to travel to other destinations like Australia, Fiji, Samoa, Cook Islands, and anywhere else that strikes our fancy.
I regularly love to read adventures and travel stories from different travel blogs. The stories and beautiful photography make me want to roam around from one place to another, so when I’m not actually traveling to a new place, I’m definitely planning the next trip.
If you are looking for some travel inspiration, make sure to check out some of my favourite bloggers:
- OneStep4ward
- Completely Wanderlust
- Nomadic Matt
- Living in Another Language
- In a Faraway Land
- Twenty-Something Travel
If you have any favourite travel writers/bloggers, please let me know by leaving a comment below! Would love to read about their journeys around the world.
The Beginning of a New Business?

I love Etsy and have always wanted to start up my own Etsy shop, but I’m not sure how I should go about it. There are also tons of other sites like Etsy that seem good too.
I love to make many different things, whether it’s with paper, fabric, wood, plastics….anything. I would love to share my handmade things with others, but don’t have much of an idea how to go about it.
Do any of you sell products online? What advice do you have for someone who wants to dive in, but doesn’t know where to start?
Please comment below and let me know what you think!
How to Create a Hanami (Cherry Blossom Viewing) Picnic at Home

As mentioned in my previous post about hanami (complete with origami cherry blossom tutorial), I wanted to recreate a cherry blossom viewing picnic scene that’s very common in Japan right now.
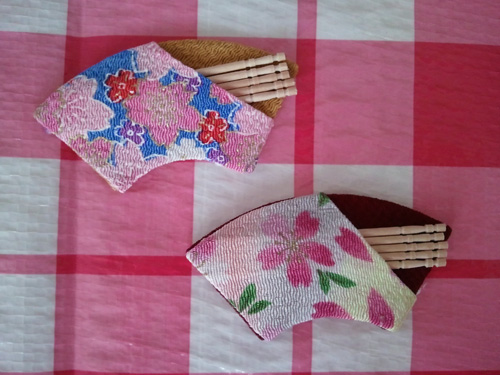
I decided to use a variety of cute sakura kirigami/origami to create a peaceful hanami atmosphere, then I added some common hanami staples like a cute plastic ground sheet (used as a tablecloth), cherry blossom chopsticks, onigiri (rice balls), noodles, grilled fish, sweet snacks, and the last but not least, beer and wine.
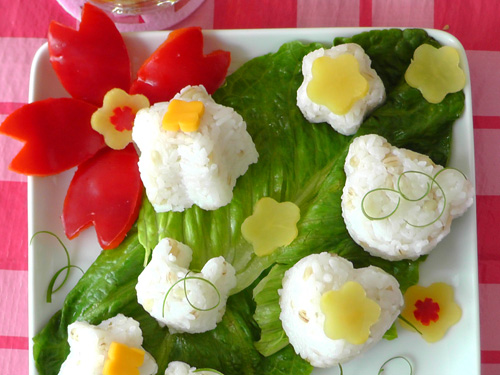
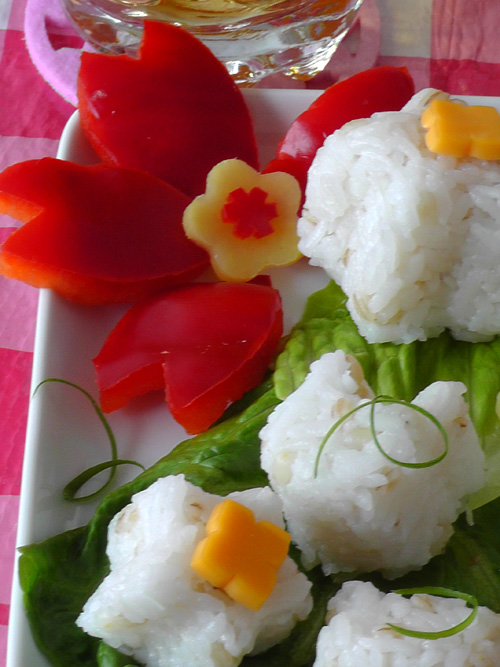
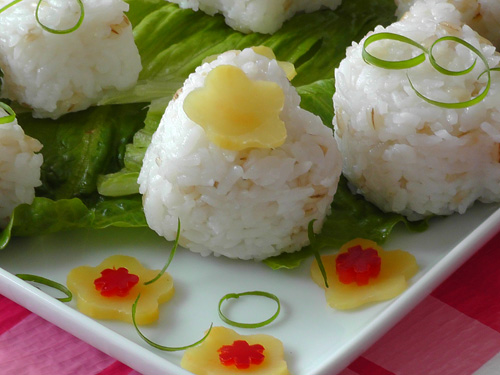
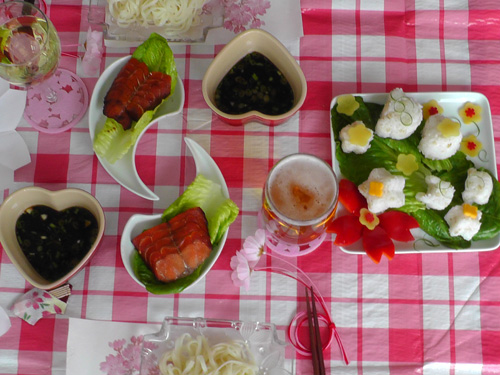
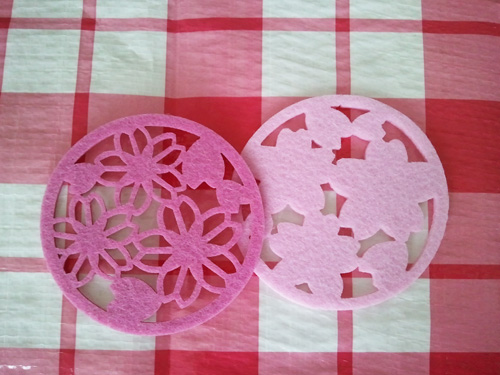
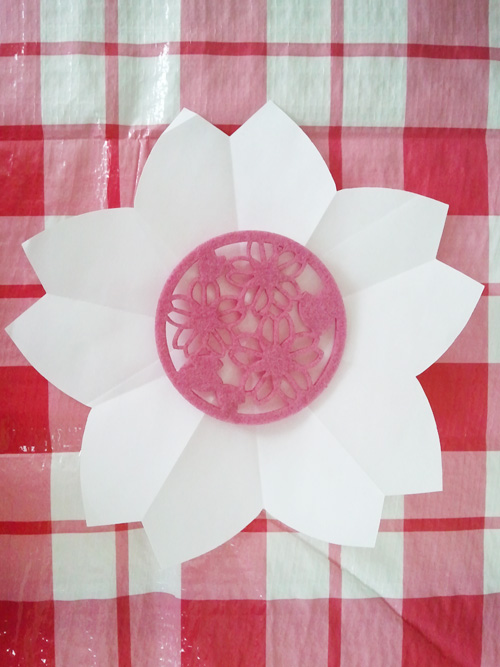
To stay on theme, I also used my felt cherry blossom coasters, kirigami cutout sakura placemats, sakura printed placemats, and a couple of mizuhiki sakura that I made a few years ago.

Please let me know what you think! I’d love to hear suggestions for future picnic setups!
Cute Japanese Bento Accessories for Hanami

Before I show you the complete hanami lunch setup, I want to show you some of the adorable bento accessories that I have straight from Japan (you can also find some through Amazon here).
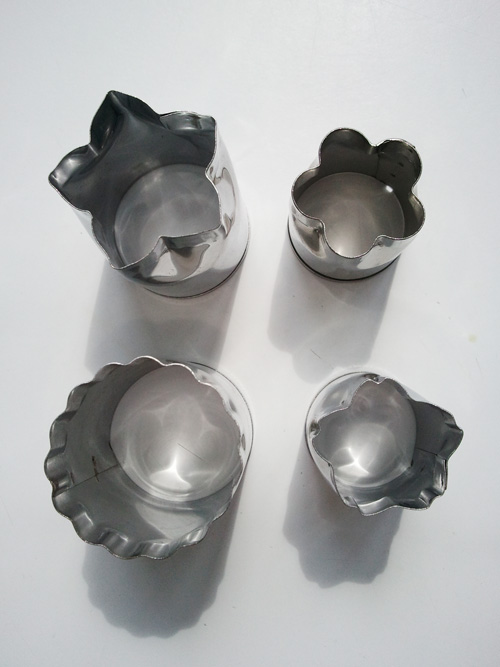
This is a lovely metal cutout set that you can use one cheese, deli meats and vegetables like carrots:
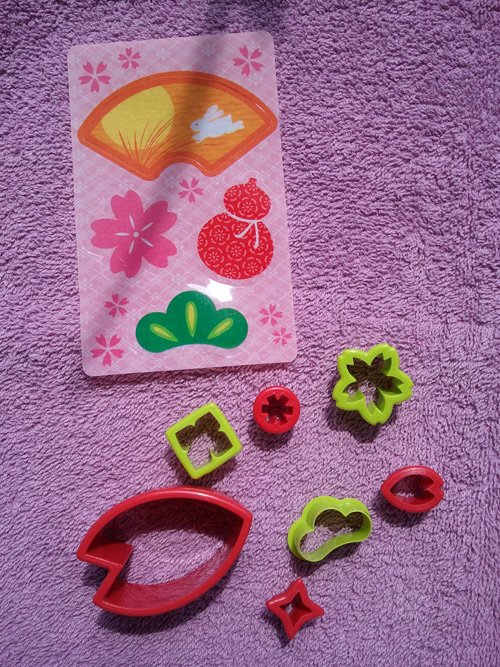
This is a very sweet set that has a variety of shapes, including individual petals to decorate dishes.
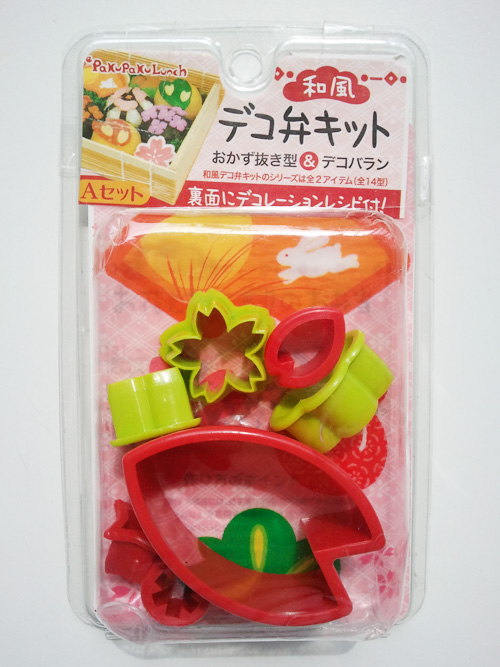
It even comes with extra decorations that you can add in your bento boxes.
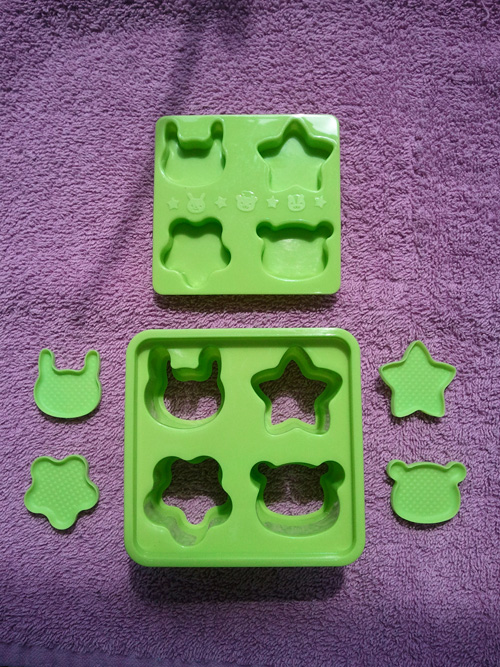
This mini mold makes cute little shapes for tiny onigiri (rice balls).
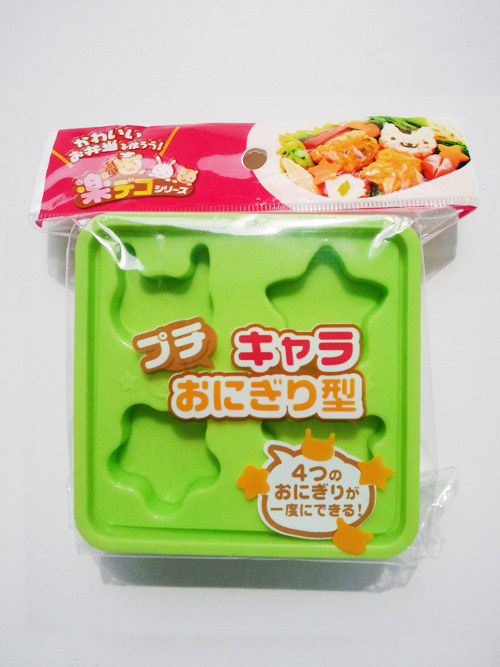
You can make bento with mini rabbit heads, star shapes, flowers and little bear heads.
A three set of rice ball shapes. These are medium sized and some with three different shapes.
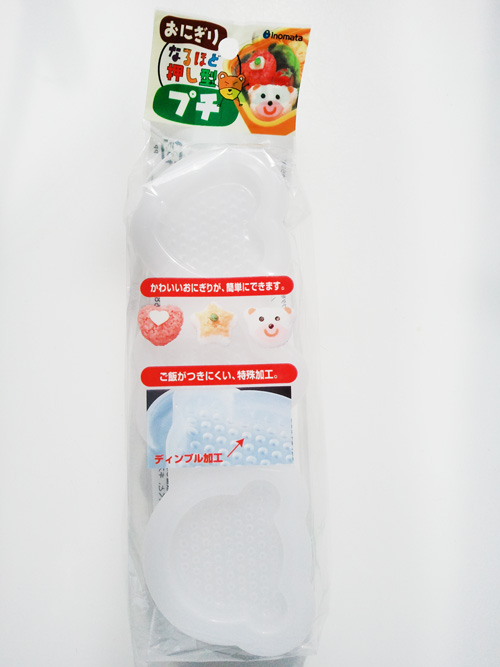
You can make rows of hearts stars and bear heads…. aren’t they cute?
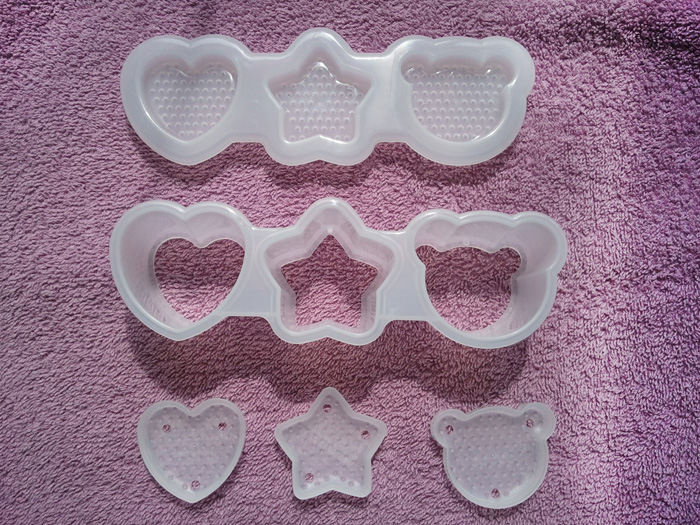
You can make the shapes as simple or as decorated as you like. Most people like to make the onigiri shapes and decorate them with Japanese nori (dried seaweed paper). I don’t have any special seaweed shape punches, so I’m stuck cutting everything out by hand, but you can get seaweed shape punches on Amazon.
Japanese Egg Moulds
I have a couple of cute Japanese egg moulds and just wanted to quickly show you how the eggs turn out.
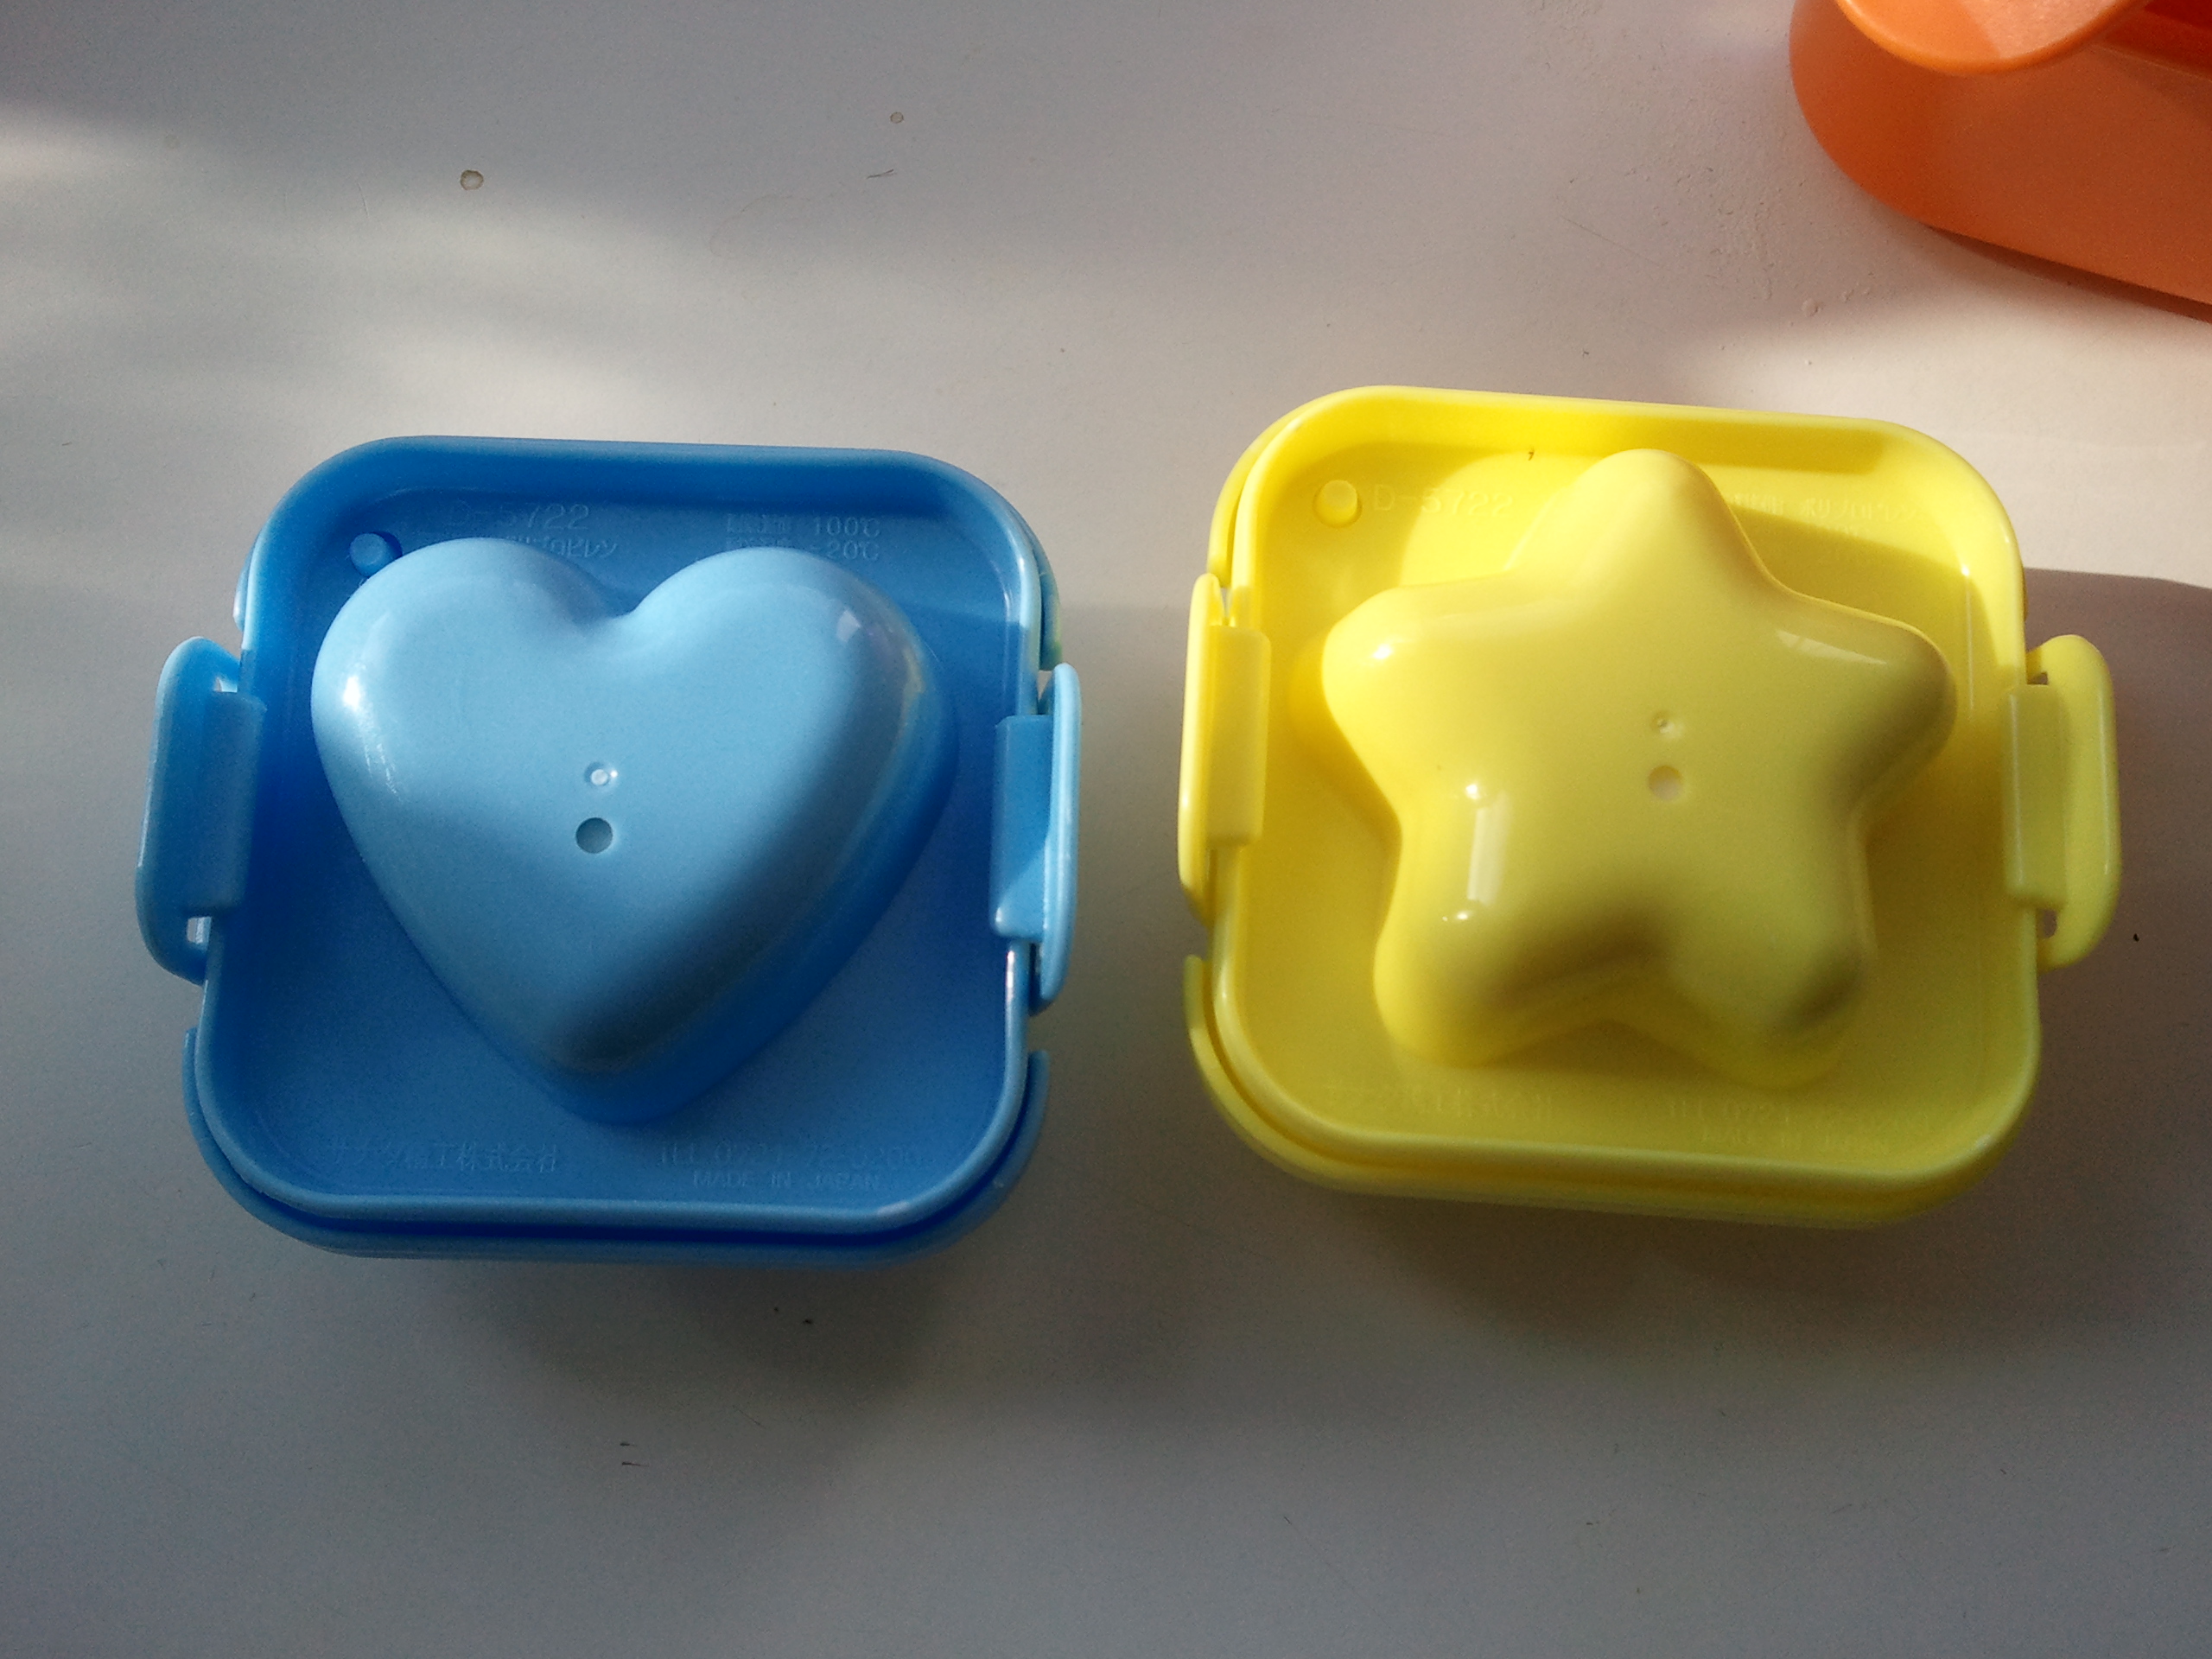
The key to making the shapes in these moulds is to peel them when they are still relatively warm and immediately lock them for a few minutes. Make sure to place the eggs straight up in the mould and squish them down with the top. Don’t worry, the eggs won’t break apart.
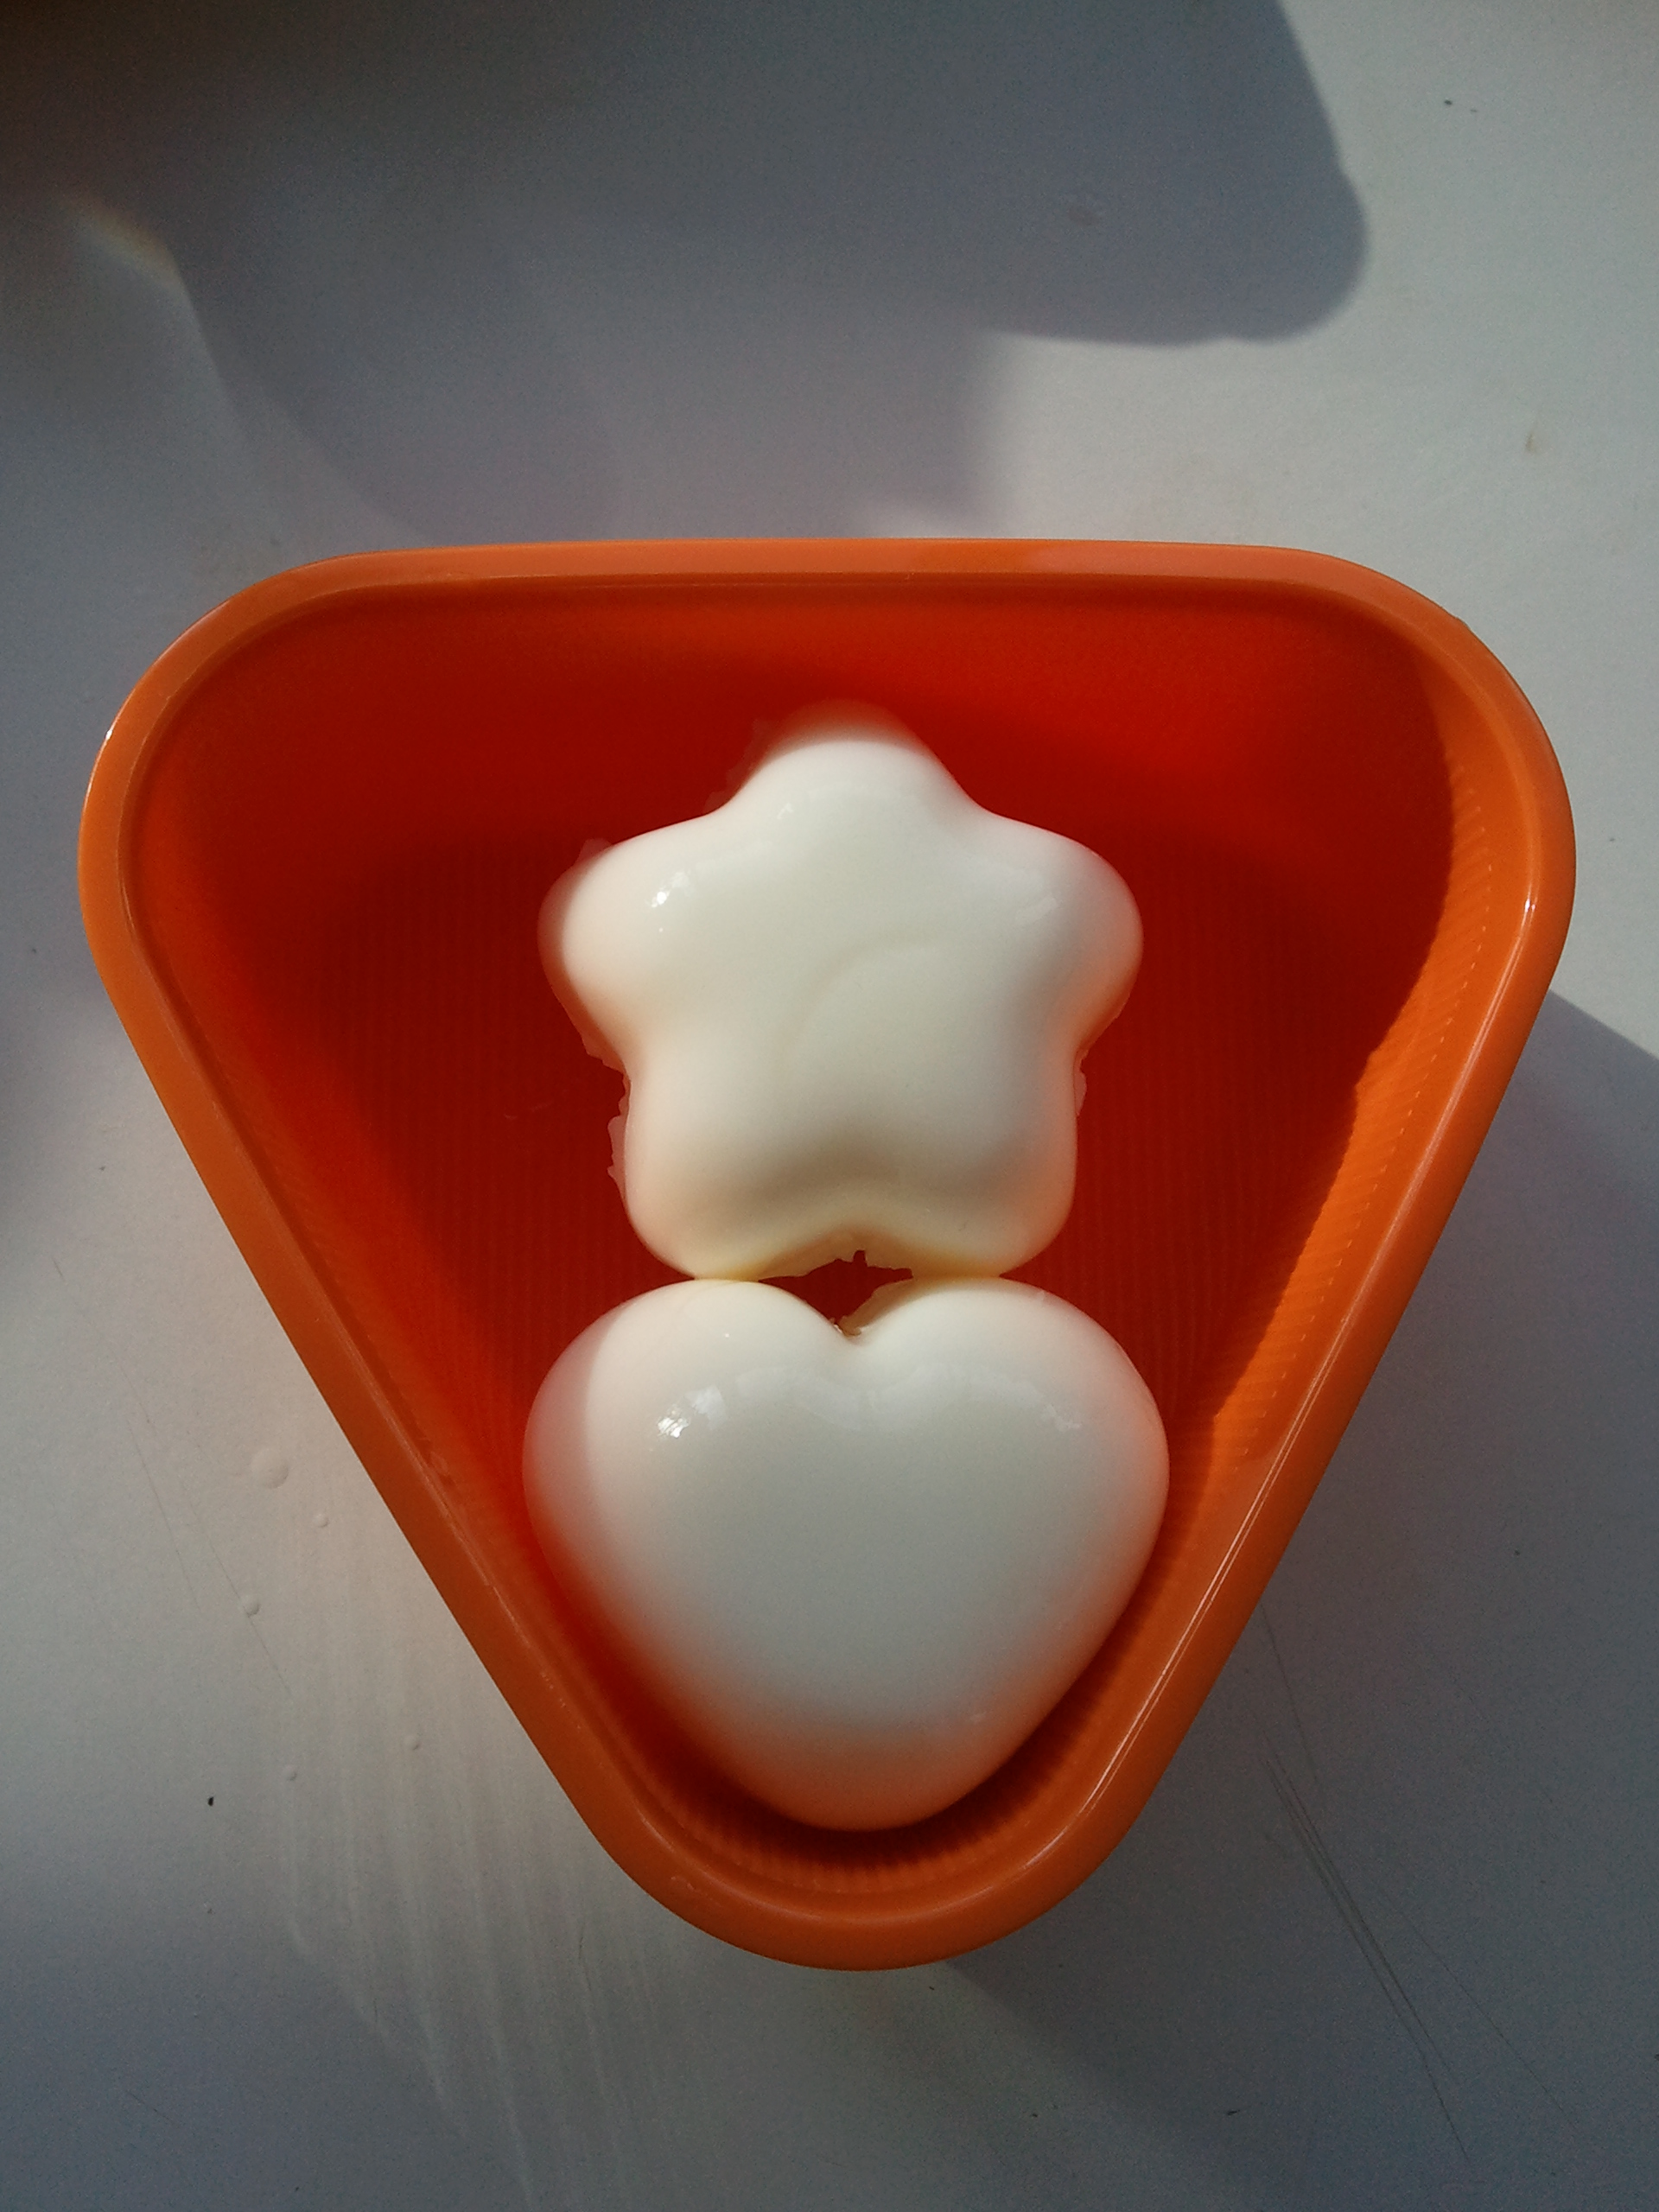
To make a nice little bento, you can fill the box with some rice, cut the eggs in half to show the cute pattern with the yolk and add a few cherry tomatoes for colour.
If you would like to get some Japanese egg moulds, you can find them on Amazon.
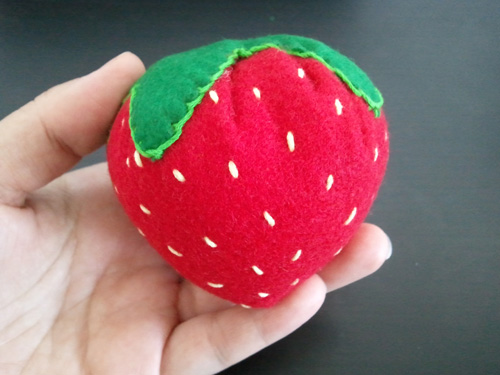
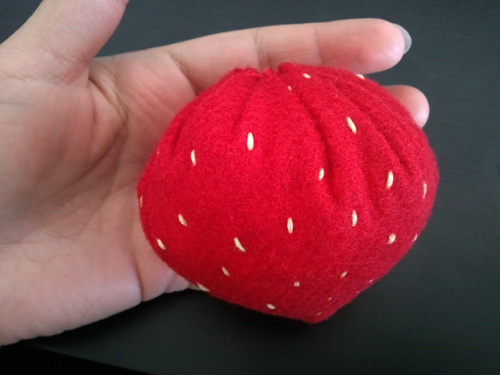
How to Make a Giant Felt Strawberry

I previously posted a felt project that I’m working on. It’s a special gift and I hope it works out.
I had quite a few people ask me how I made the felt strawberry shown in the post. The ones I’m currently making are more or less real strawberry sizes, but for this tutorial, I will show you how to make big strawberries!
You will need:
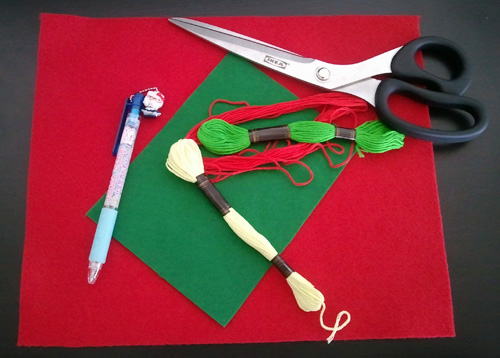
- 1 large piece of red felt
- 1 medium piece of green felt
- Embroidery needle
- 2-3 skeins red and green embroidery floss (you may need more for extra large strawberries)
- 1 skein mint or yellow embroidery floss (you can also use red, black or cream floss)
- A generous amount of toy/pillow stuffing
How to Make the Felt Strawberries
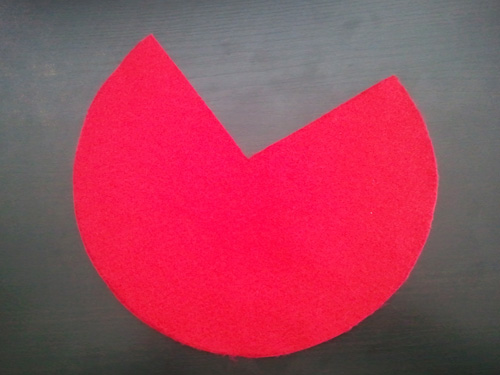
Start off with a large piece of red felt (the bigger your piece of felt, the bigger your strawberry will be). Next, you need to cut out a shape like this:
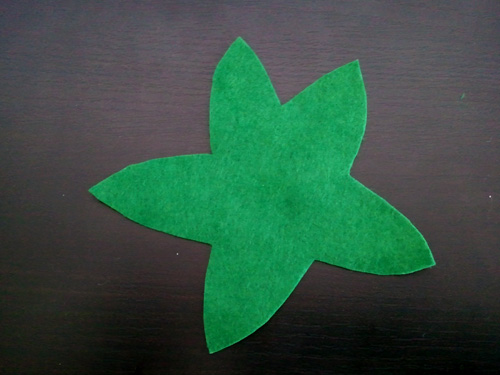
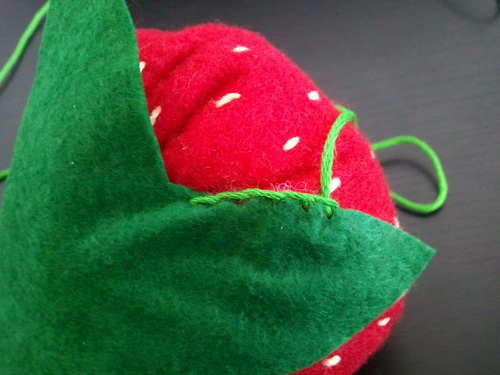
Now take your green felt and cut out a shape like this:
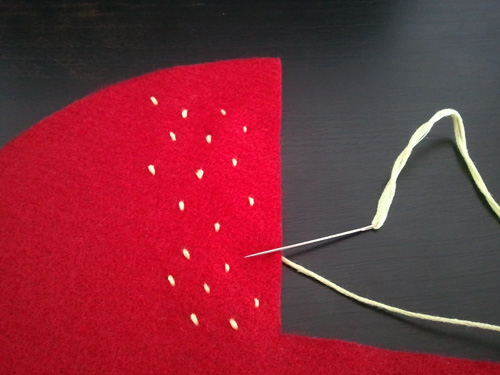
Cut out the pieces and set the green piece aside. Take your mint/yellow embroidery floss and thread it through the needle. Sew on the achenes (these are the seed-looking things on the outer part of strawberries) in a random pattern.
Fold over the red felt, so the inside is facing out. Sew along the seam, leaving the top open.


Sew a running stitch along the top edge of the strawberry, making sure to only use one thread (you’ll have to pull it taut in a moment). Do not tie it off, just leave it loose with the needle still attached.
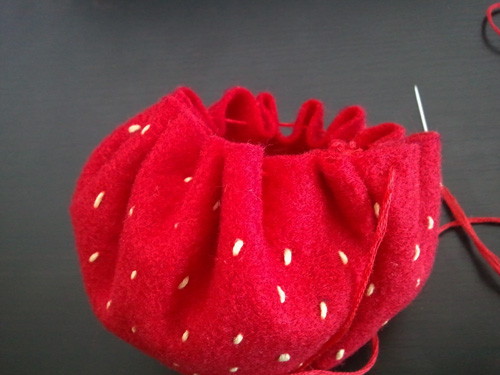
Stuff the strawberry until you get a desired plumpness and pull the thread taut. You should stuff it until you’re still able to pull the top parts shut.
Place your green cutout on top and secure it with a blanket stitch.
There you go! A simple giant felt strawberry!
If you would like me to show off your felt creations, please send me a message here.
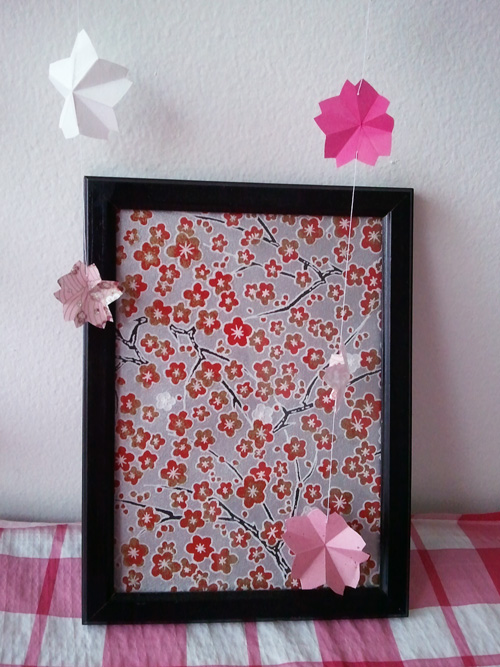
Origami Sakura to Celebrate Spring

If you are living in Canada like me, chances are you feel like Spring will never ever arrive, but I still have hope for Mother Nature!
In Japan, hanami (cheery blossom viewing) season will soon begin and I still miss it very much. In an attempt to make our home feel a little more like hanami, I decided to make a bunch of mini origami sakura from small origami paper and my stash of Japanese washi/chiyogami.
If you would like to make these adorable origami sakura for a fun Spring craft, check out the diagram below, or check out the Origami Club animated instructions here: http://en.origami-club.com/flowers/sakura2/anime-sakura/index.html

Courtesy of origami-club.com
You can arrange these sakura blossoms on cards, canvases, hang them up, dress up mirrors/windows, create jewelry -anything you can think of!
Check back soon to see what I did with my mini sakura origami. I hope you love it!
Toronto National Home Show 2014

I recently went out to the National Home Show & Canada Blooms. There were 700+ exhibitors showing off environmentally friendly products and services for everything your home would need indoors and out (including tons of landscaping ideas).
We spent about 4 hours walking around to see as much as we could, but we still didn’t manage to see everything.
To give you an idea of what they had, check out these photos:
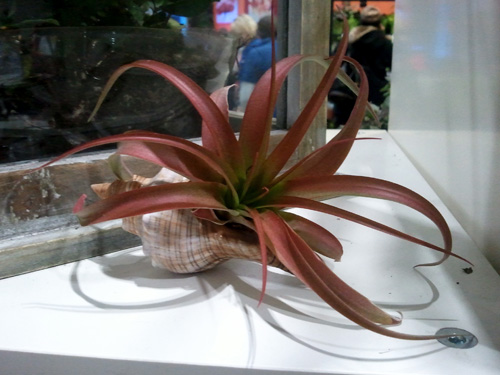
- Lovely air plant in a shell
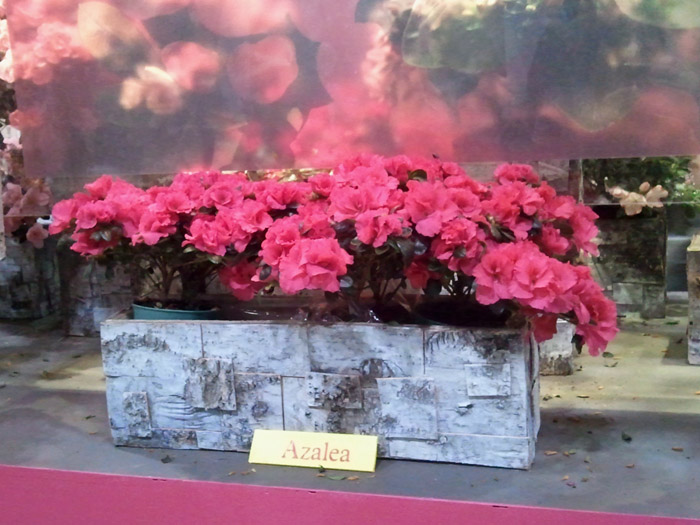
Beautiful azalea in a planter box.
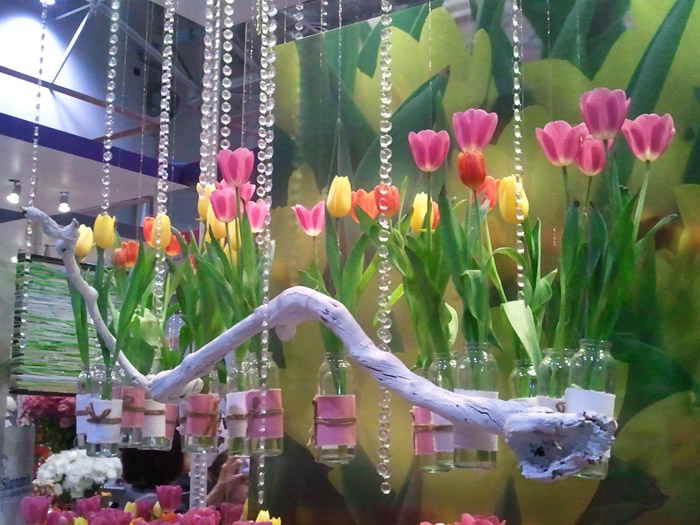
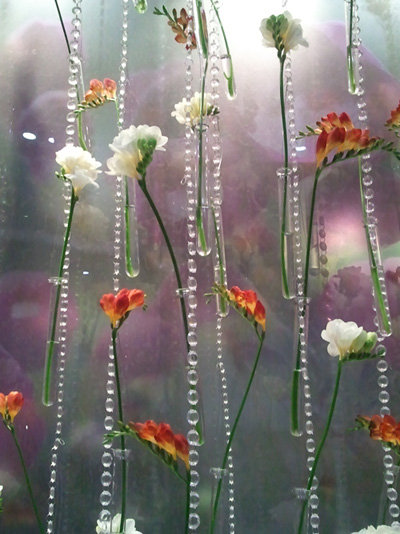
- I love this hanging tulip display.
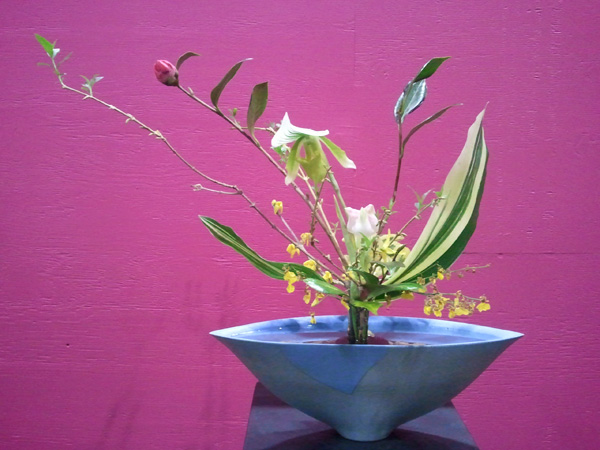
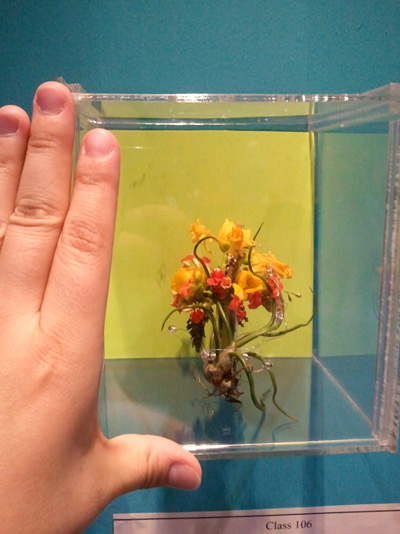
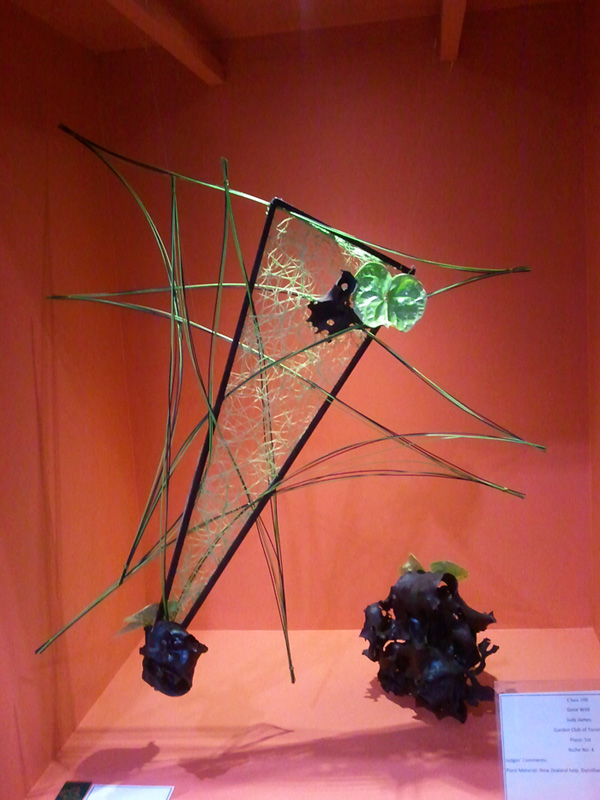
Typical example of an Ikebana arrangement.
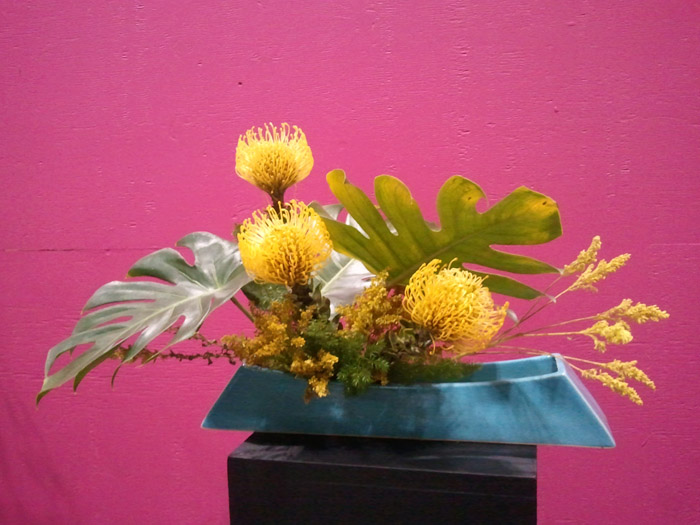
Yellow Ikebana arrangement.
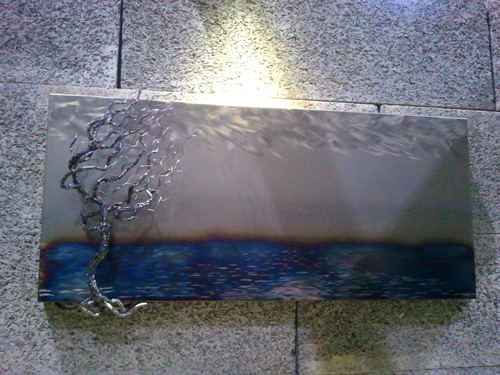
Interesting painting with a 3D metal wire tree.
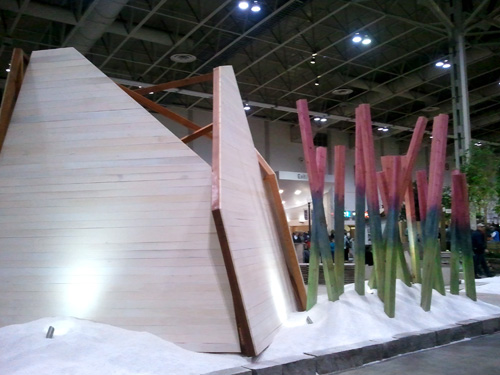
Artistic outdoor decor. Find out what the cream wall really is in one of the photos below.

A rock wave feature with moss.
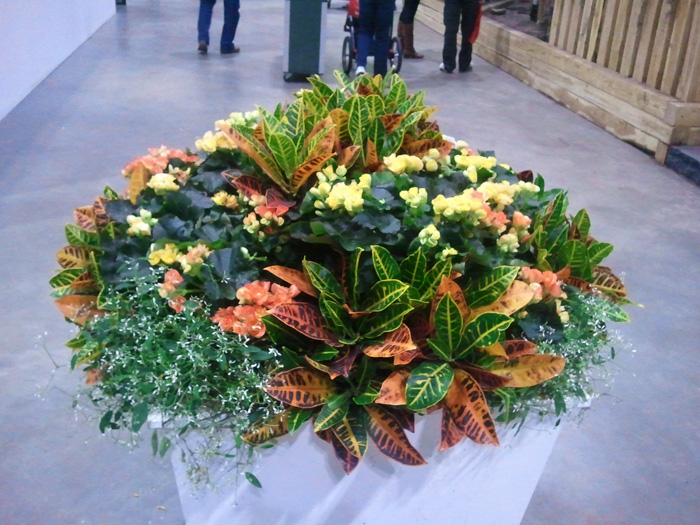
Large potted plant arrangement.
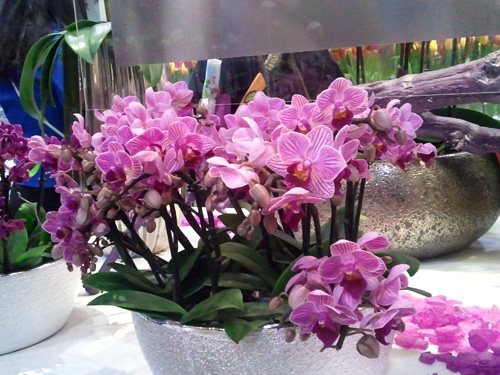
Mini orchid arrangement.

A collection of paintings.

A wheelbarrow flower arrangement.
I would love to try a wall decoration like this.
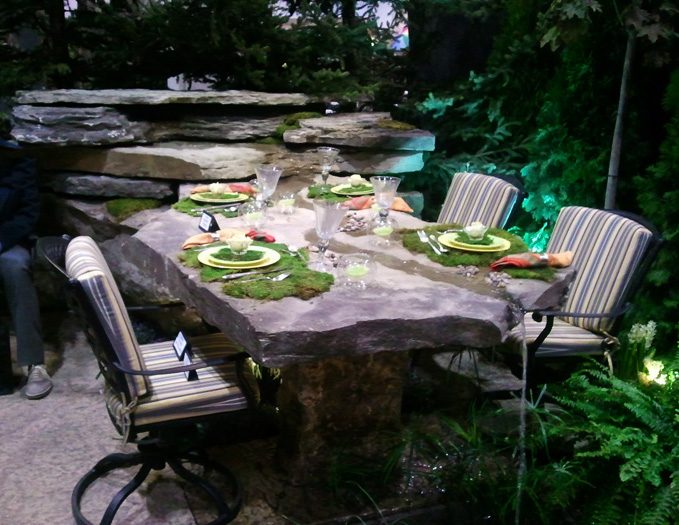
I absolutely love this rock table!

A field of flowers.
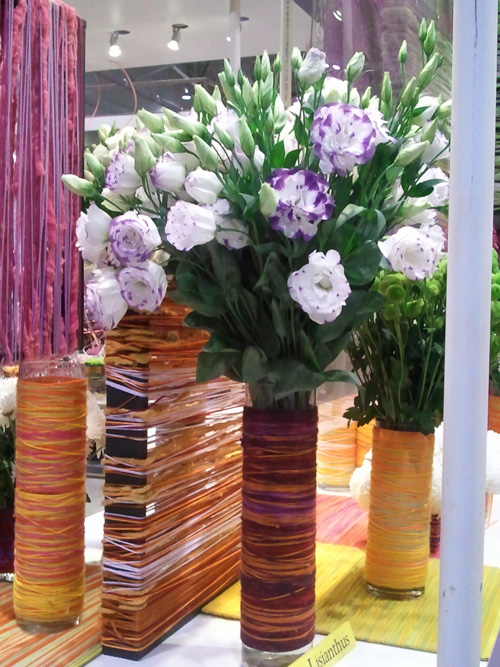
Here’s a great idea for decorating plain vases with colourful string.
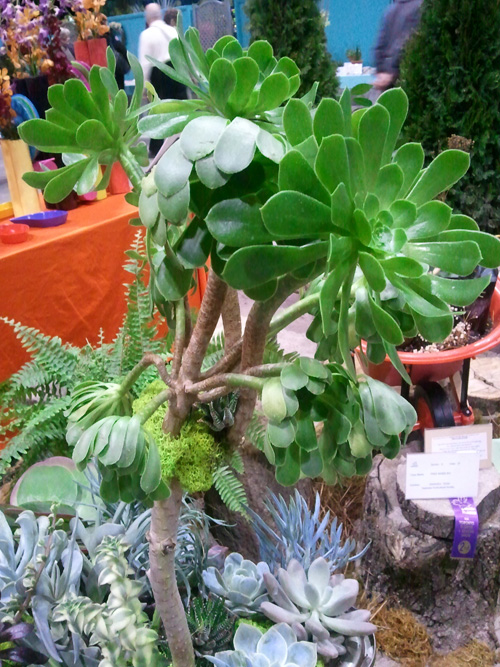
Great succulent arrangement.
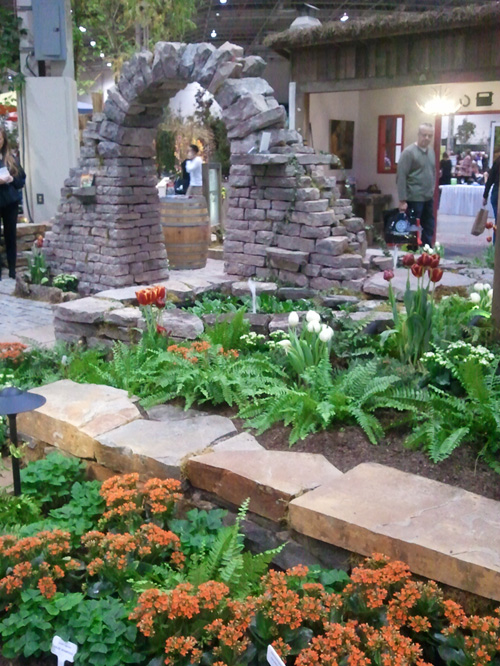
This rock arch display must have taken a lot of work.
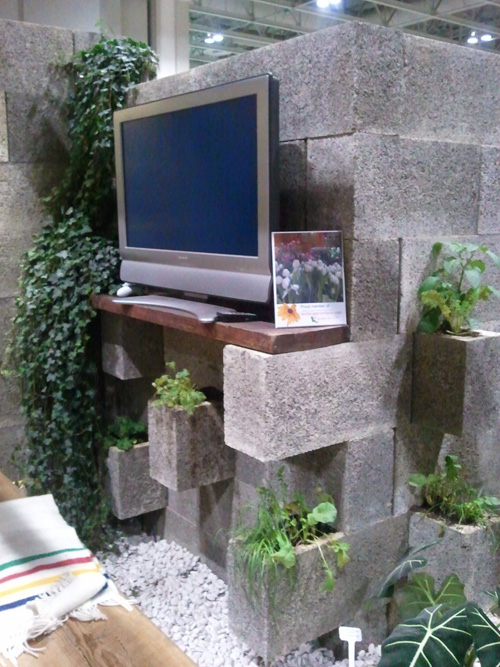
Simple rock wall feature to double as shelves outdoors.
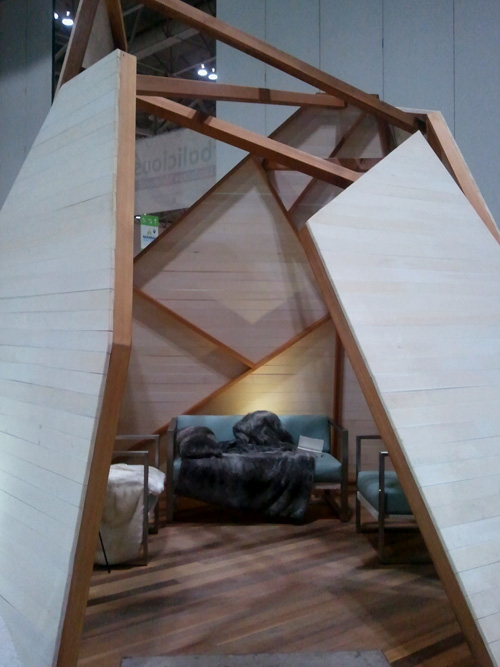
Love this hidden room.
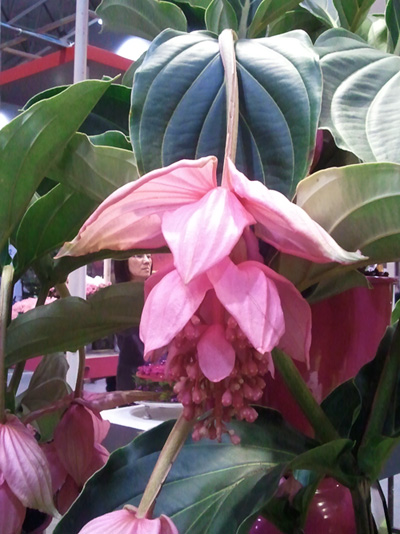
Interesting pink flower. Anyone know what it’s called?
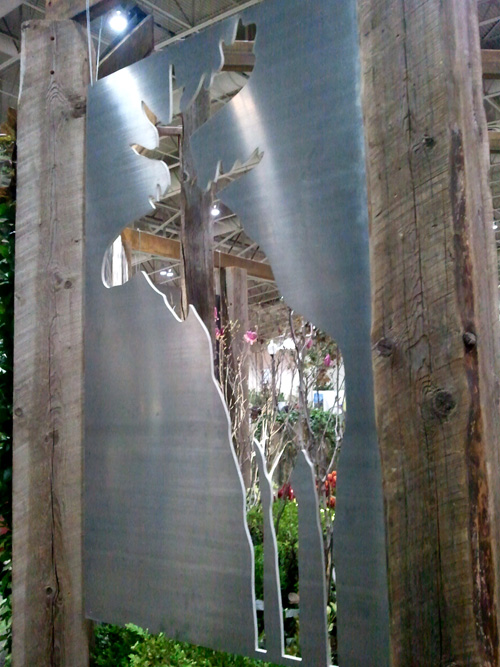
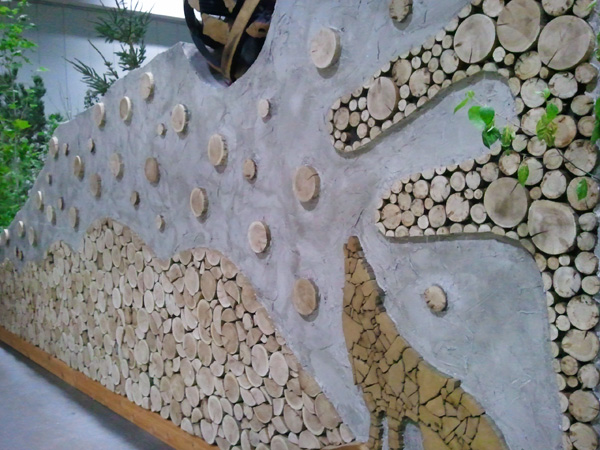
Also love this moose cutout.
Smaller flower arrangement I’ve ever seen.
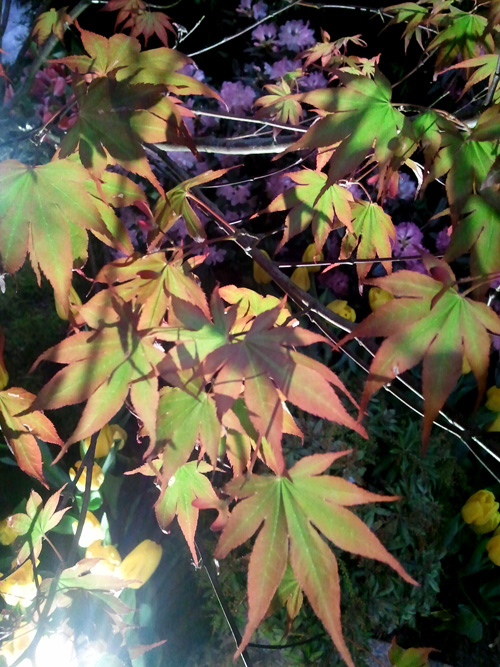
Japanese maple leaves.
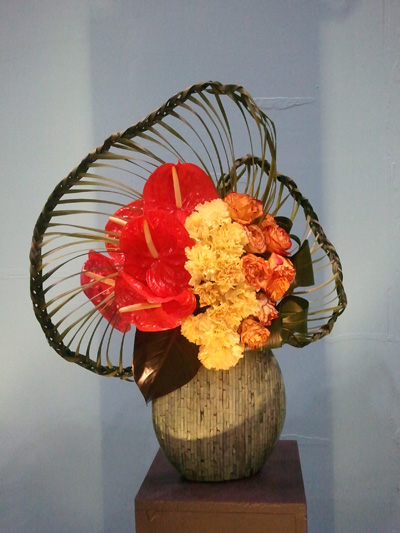
Tropical Ikebana arrangement.
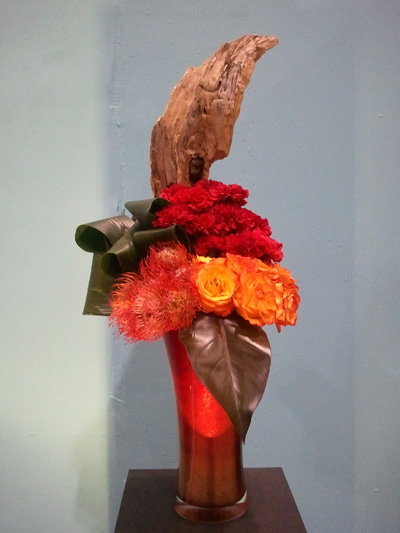
I love the simplicity of this arrangement.
I love the striking colour combinations for this arrangement.
This would be a pretty flower display for parties.
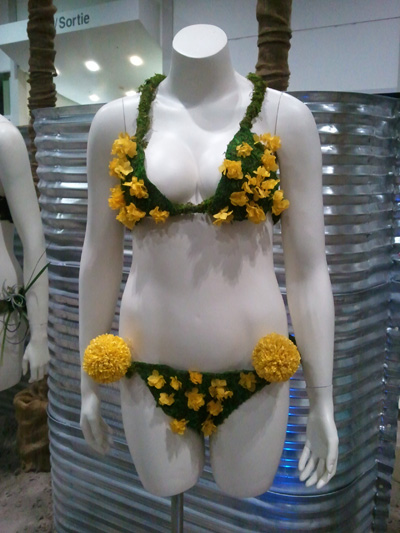
Nartural flower bikini.

Outdoor fountain… not sure about the elephant though.
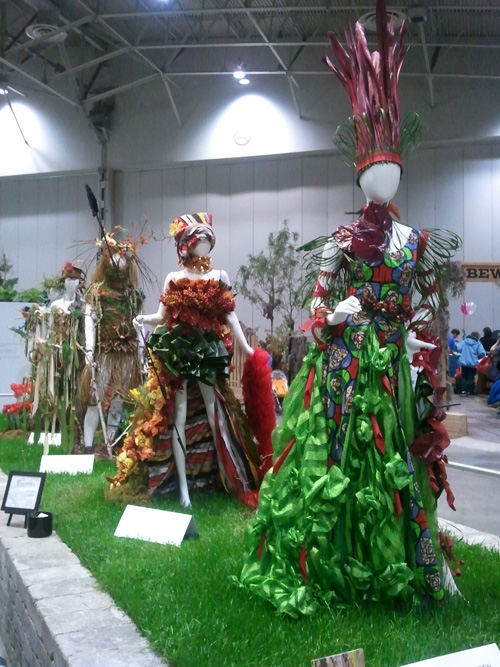
Creative dresses.
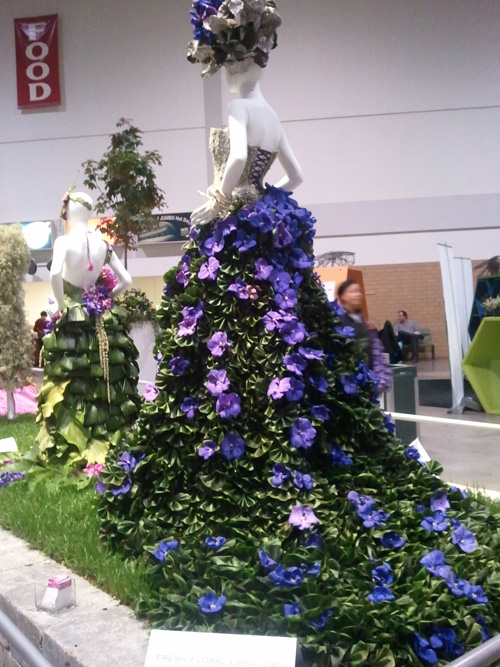
I love this purple flower dress train.
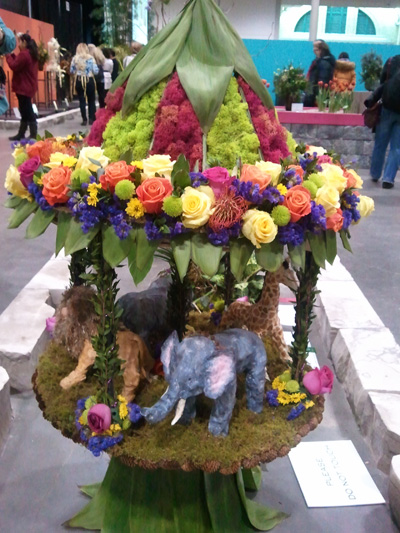
This is the cutest flower carousel ever!
Smoothie Recipes for Digestive Problems

Over the last few years, I have developed many digestive problems, especially when it comes to digesting greens like spinach and kale. This has created many problems getting adequate vitamins and minerals from the foods that I can normally eat.
I have tried to eat small amounts of different foods to get proper nutrients, but nothing worked (and it was painful for me too). My best friend was kind enough to give me a healthy smoothie book full of recipes that are easy to digest and provide a wide range of vitamins, minerals, fibre and antioxidants.
I tried some of the smoothies from the book and they were delicious. The only problem is that hardly any of them had kale (which I love). This book also made me want to experiment with my own smoothie creations using kale.
I’ve tried different combinations and this is the one that has been the easiest on my stomach. Try it out and see if you like it!
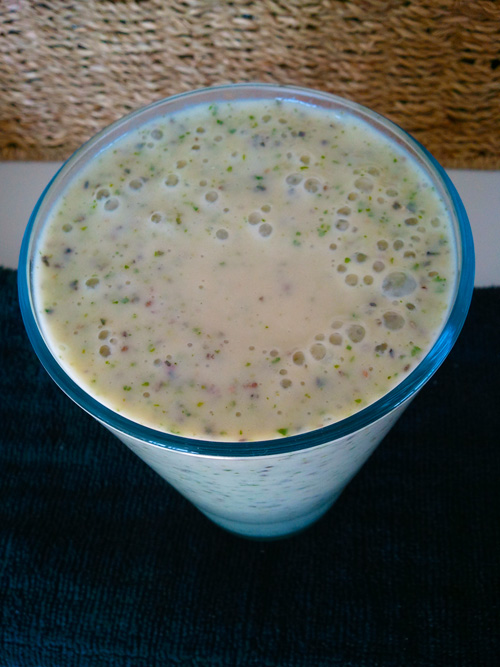
Ingredients
- 1 large kale leaf (you can slowly add more as you get used to it).
- Banana
- Chia
- Silken Tofu or Natural /Vanilla Yogurt ( I use lactose free vanilla yogurt)
- Almond Milk
- Optional: honey, stevia or agave nectar
Toss everything into a blender and blend for a couple of minutes until it has a smooth, uniform look.
Be aware that silken tofu will thicken the smoothie quite a bit and fill you up pretty well. I normally drink this with a snack in place of a full meal.
Benefits of the Ingredients:
Kale – vitamin A, vitamin B1, vitamin B2, vitamin B6, vitamin C, vitamin E, vitamin K, calcium, manganese, copper, fiber, potassium, iron, magnesium, omega-3, and phosphorus.
Banana – vitamin B6, vitamin C, potassium, manganese, fiber, copper
Chia – fibre, omega 3, calcium, manganese, phosphorus, and protein
Silken Tofu – calcium, manganese, iron, copper, protein, selenium, phosphorus, vitamin B1, omega-3, magnesium, and zinc
Yogurt – iodine, vitamin B2, vitamin B12, phosphorus, calcium, protein, zinc
Almond Milk – calcium, potassium, riboflavin, vitamin A, vitamin B12, vitamin E, zinc, and fibre
Honey – protein, calcium, iron, natural sugars, carbohydrates, Vitamin C, folate, and potassium
Agave Nectar – fructose, glucose, carbohydrates, fibre
Stevia (natural stevia leaf) – protein, fiber, vitamins A, vitamin C, carbohydrates, iron, phosphorus, calcium, potassium, sodium, magnesium, and zinc
If you have any digestive problems, I would love to hear what you do to help get nutrients each day.
How to Make Envelopes from Heart Shapes

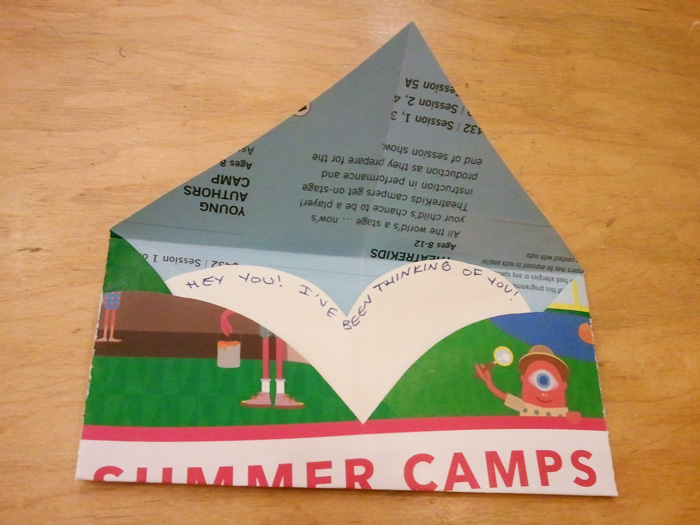
I love all kinds of crafts. Normally, I love to try intricate and difficult craft projects, but most days, I just feel like making something quick and easy.
For those of you wanting to recycle magazines or scraps of paper, here’s a sweet and easy envelope that you can make out of a heart shape.
You will need:
- Scrap paper (magazines, newspapers, gift wrapping…)
- Scissors
- Pen
- Double-sided tape or glue stick
How to Make It
Start with your piece of paper. Any size will work, but just remember that the bigger your piece, the bigger the envelope.
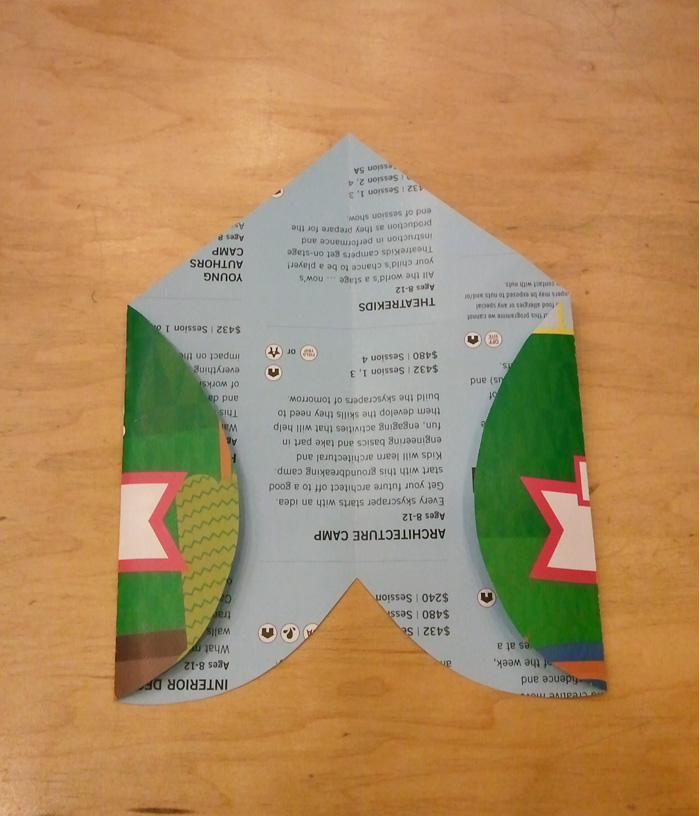
Fold the paper in half lengthwise.
Draw half a heart shape from the folded edge (the folded edge should be the middle of the heart). Cut it out.
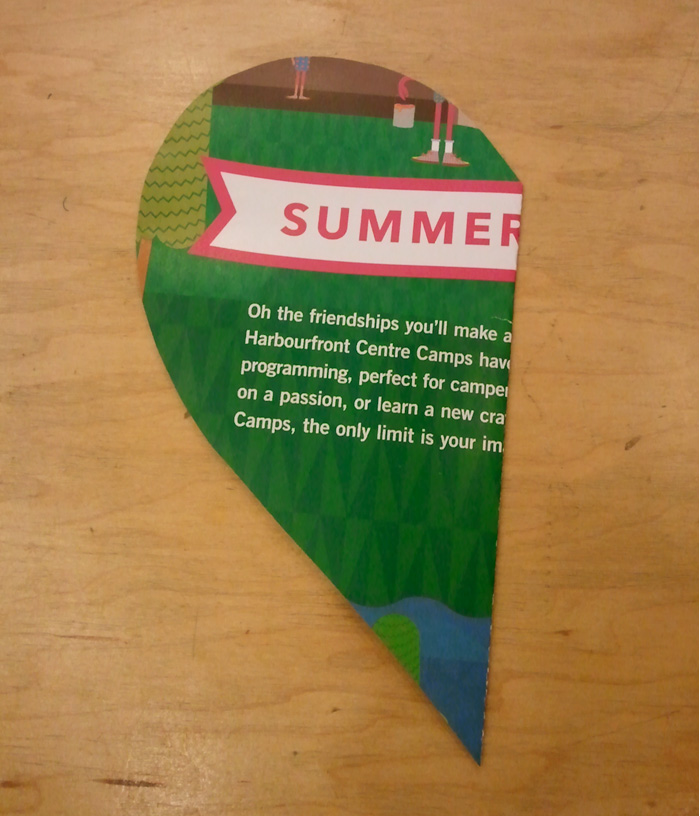
Open it up.
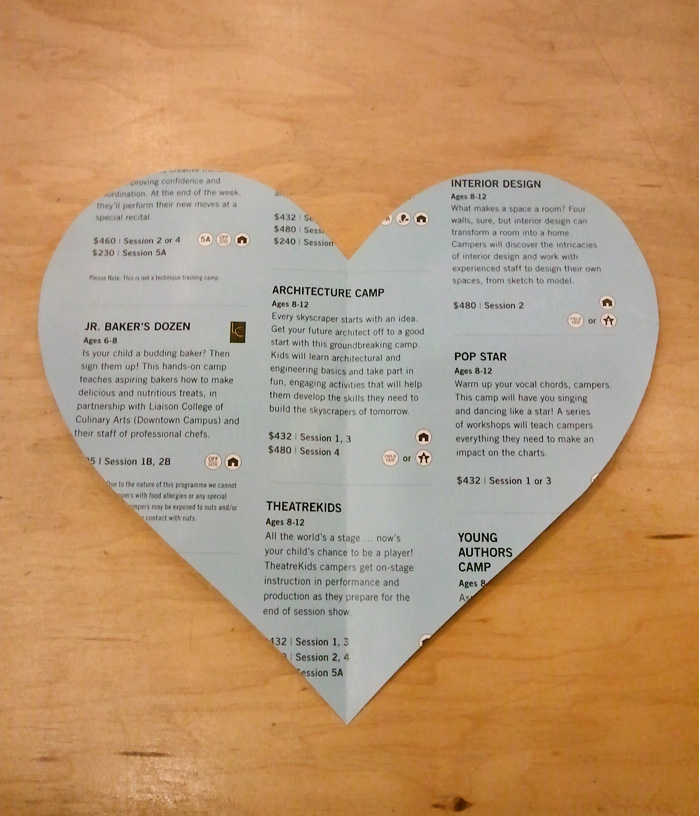
Flip it upside down and fold in the sides (about one quarter in).
Fold the bottom end up (about one third). Secure the sides with double-sided tape or glue.
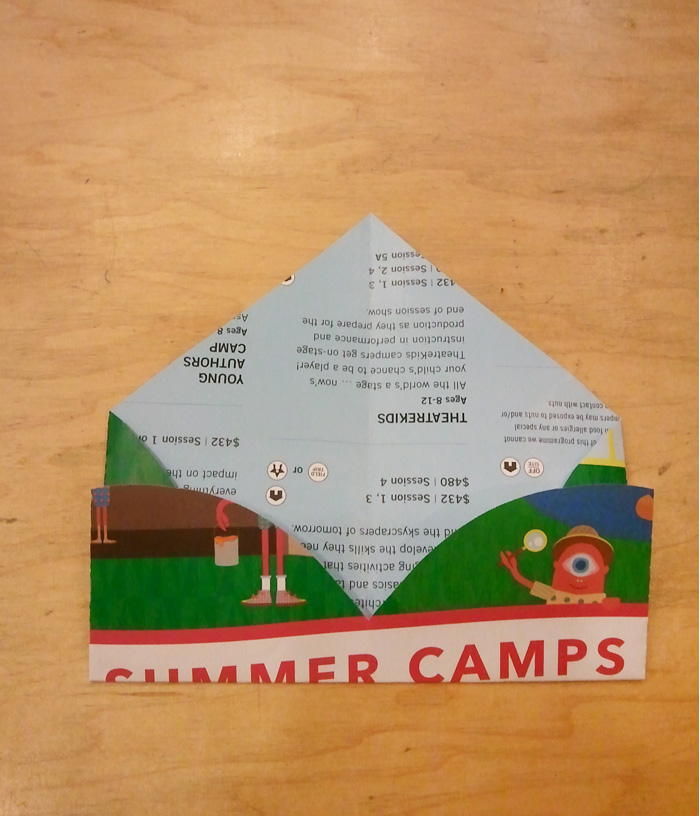
Fold the top third down.
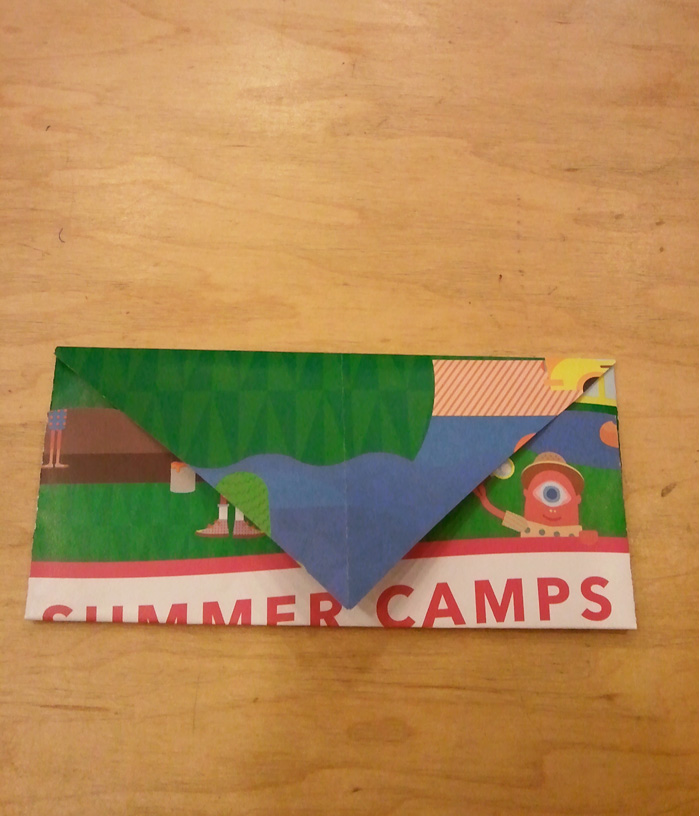
There you are, quick and easy envelopes with a cute sweetheart design when the envelope is opened up.
Make them from excess wrapping paper to match gifts, use up interesting pamphlets, flyers and magazines or decorate some plain scrap paper for a more personal touch.


