
How to Create a Hanami (Cherry Blossom Viewing) Picnic at Home
As mentioned in my previous post about hanami (complete with origami cherry blossom tutorial), I wanted to recreate a cherry blossom viewing picnic scene that’s very common in Japan right now.
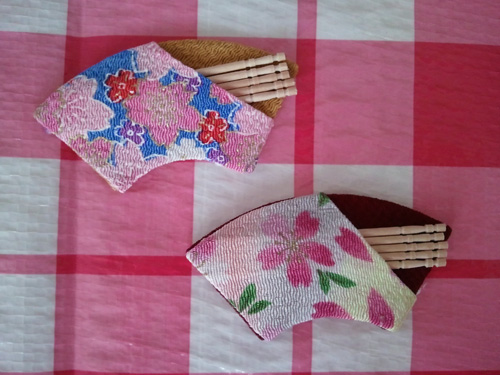
I decided to use a variety of cute sakura kirigami/origami to create a peaceful hanami atmosphere, then I added some common hanami staples like a cute plastic ground sheet (used as a tablecloth), cherry blossom chopsticks, onigiri (rice balls), noodles, grilled fish, sweet snacks, and the last but not least, beer and wine.
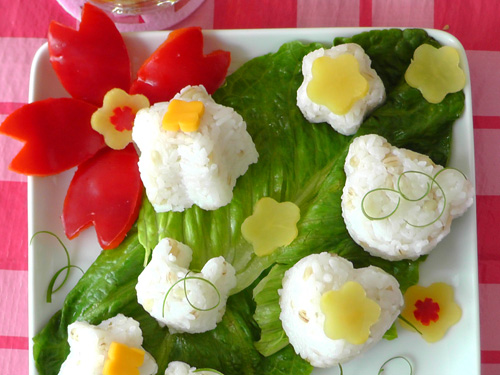
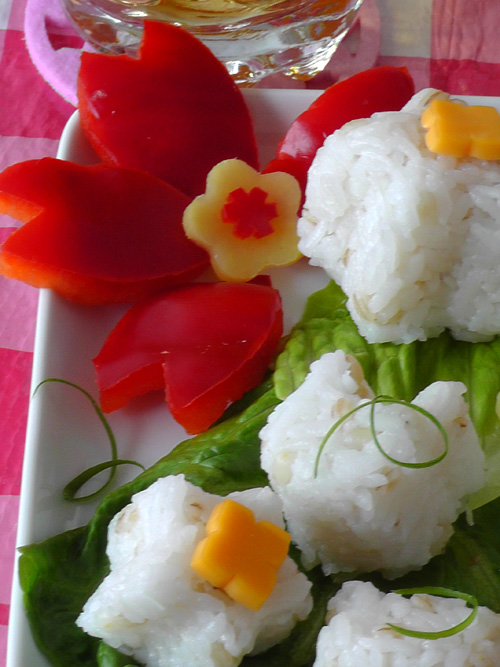
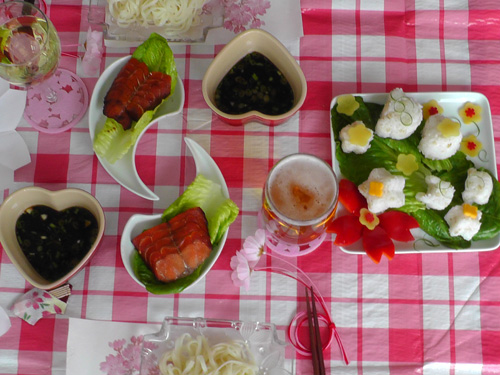
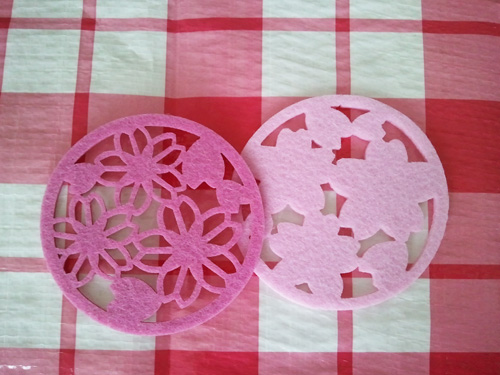
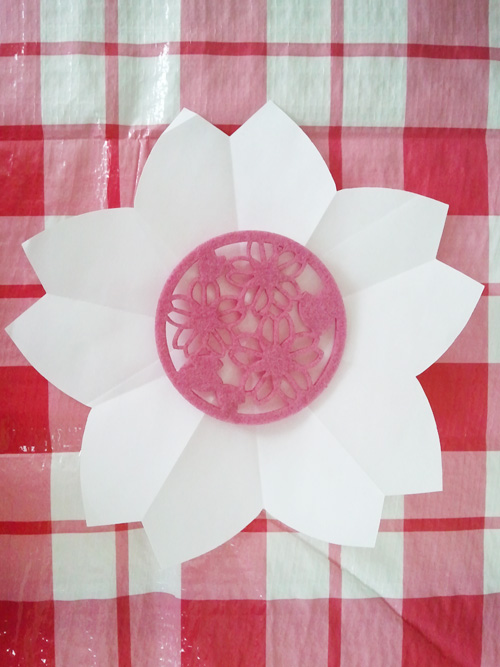
To stay on theme, I also used my felt cherry blossom coasters, kirigami cutout sakura placemats, sakura printed placemats, and a couple of mizuhiki sakura that I made a few years ago.

Please let me know what you think! I’d love to hear suggestions for future picnic setups!
Cute Japanese Bento Accessories for Hanami
Before I show you the complete hanami lunch setup, I want to show you some of the adorable bento accessories that I have straight from Japan (you can also find some through Amazon here).
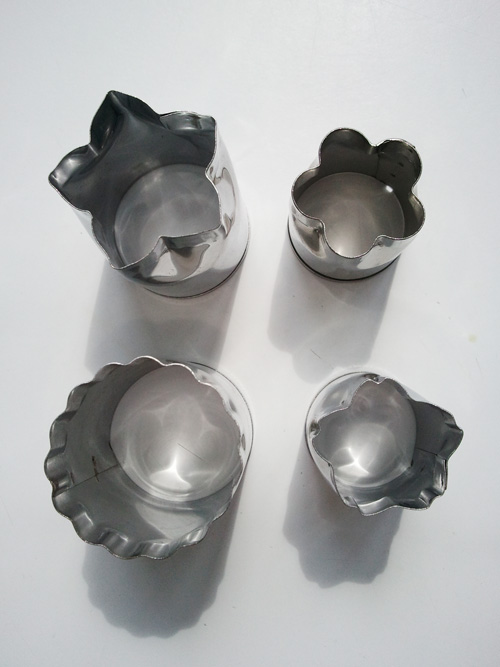
This is a lovely metal cutout set that you can use one cheese, deli meats and vegetables like carrots:
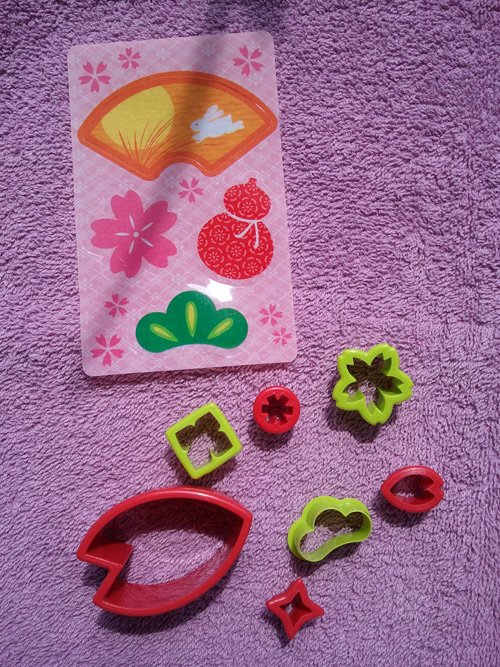
This is a very sweet set that has a variety of shapes, including individual petals to decorate dishes.
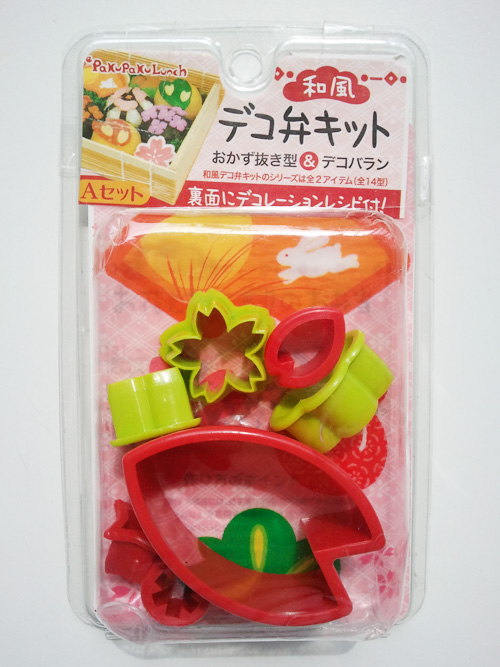
It even comes with extra decorations that you can add in your bento boxes.
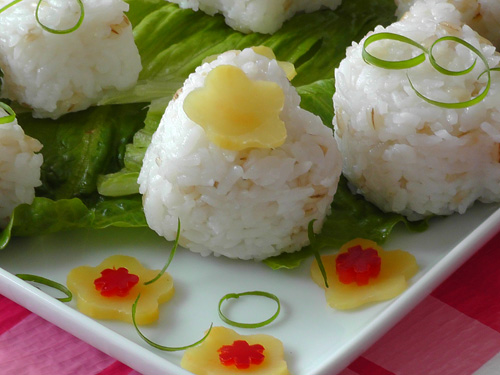
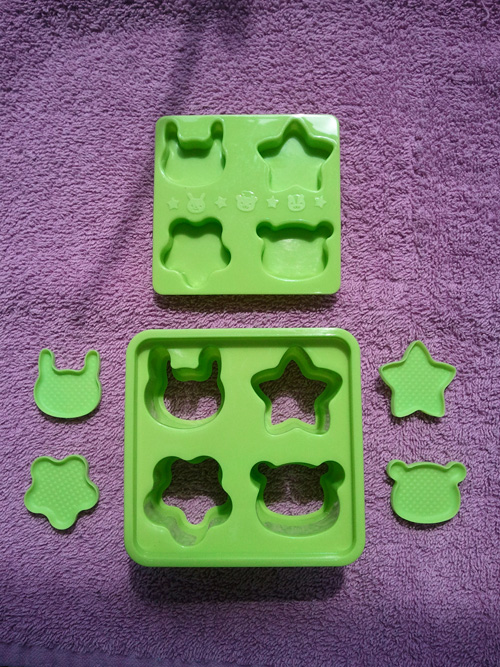
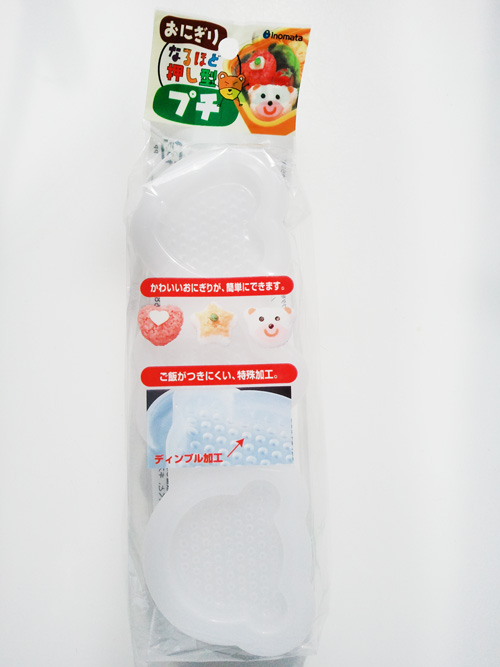
This mini mold makes cute little shapes for tiny onigiri (rice balls).
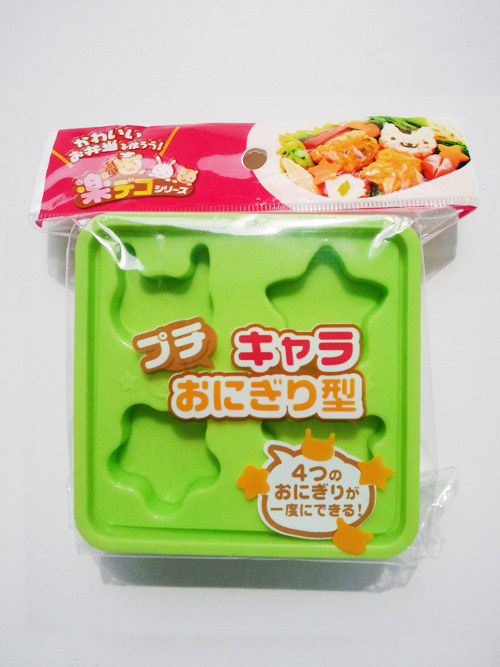
You can make bento with mini rabbit heads, star shapes, flowers and little bear heads.
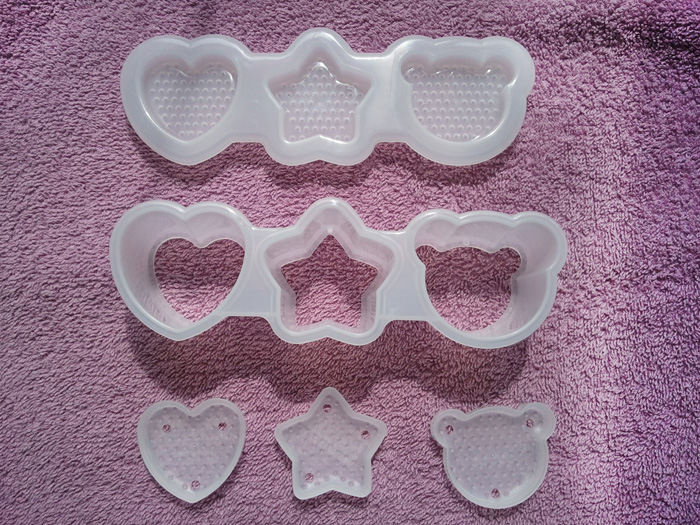
A three set of rice ball shapes. These are medium sized and some with three different shapes.
You can make rows of hearts stars and bear heads…. aren’t they cute?
You can make the shapes as simple or as decorated as you like. Most people like to make the onigiri shapes and decorate them with Japanese nori (dried seaweed paper). I don’t have any special seaweed shape punches, so I’m stuck cutting everything out by hand, but you can get seaweed shape punches on Amazon.
Origami Sakura to Celebrate Spring
If you are living in Canada like me, chances are you feel like Spring will never ever arrive, but I still have hope for Mother Nature!
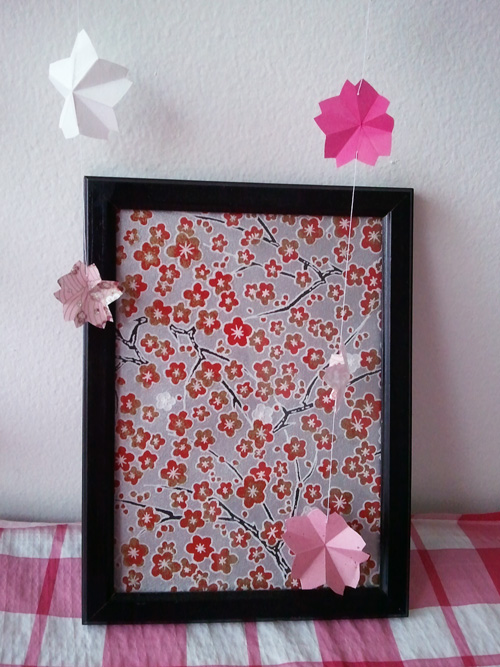
In Japan, hanami (cheery blossom viewing) season will soon begin and I still miss it very much. In an attempt to make our home feel a little more like hanami, I decided to make a bunch of mini origami sakura from small origami paper and my stash of Japanese washi/chiyogami.
If you would like to make these adorable origami sakura for a fun Spring craft, check out the diagram below, or check out the Origami Club animated instructions here: http://en.origami-club.com/flowers/sakura2/anime-sakura/index.html

Courtesy of origami-club.com
You can arrange these sakura blossoms on cards, canvases, hang them up, dress up mirrors/windows, create jewelry -anything you can think of!
Check back soon to see what I did with my mini sakura origami. I hope you love it!
How to – Simple (and Inexpensive) Back-to-School Set
When little ones start school or go back to school, they always want to be more like the “big kids”. Although children in preschool and kindergarten don’t require notebooks, it’s possible to make an easy DIY personalized notebook just for fun. Throw in a few more things to go along with it and they will instantly feel more important and organized for their “long” days in school.

Unfortunately, I didn’t take photos of the other items in this set so I’ll list them for you here:
- DIY notebook
- Pink pencil to match the notebook
- Printed calendar with cute animal characters
- After school schedule sheets
- “First days of school” diary sheets (one lined page and one illustration page per day for one week) .
- Pink kitty cat buttons (for crafts, clothing or bags)
- Two pink flower patches (for clothes, shoes or bags)
- One embroidered row of hearts with adhesive backing (for stationery decoration)
- Handmade greeting card with an owl (for good luck)
Everything was placed in a flexible and expandable plastic case to keep everything dry and to make room for school work.
To make your own notebook, all you need is:
- a bunch of three-hole lined paper
- two pieces of cardboard paper (same size or larger than the lined paper)
- three evenly cut pieces of ribbon
- scrap cardboard paper (preferably in a contrasting colour to the other pieces)
- adhesive (double-sided tape, glue, paste…)

Use a three-hole punch on the cardboard. Make sure the holes line up with the lined paper.

I made a kirigami flower and taped it to the front along with a line at the top for the name.
*You can find the kirigami flower instructions here.

Finally took the rest of my paper scraps to make a bunch of kirigami hearts.
Comment below to let me know what you think. If you made some of your own DIY back-to-school items, please send me a message and I might just feature you on the site!
Kirigami Story/Poem Mobile
Kirigami is a great way to create fun and inventive works of art. It’s the kind of craft that can recycle different materials like paper from many of the common items that are found around the home.
Here’s a great project for a kirigami mobile where you can hang special messages, poetry or even a child’s favorite story.
You will need:


First, choose a few passages from a poem or story or write your own. (I chose passages from Romeo and Juliet)
Next, draw or print the first word (or one of the first words) from each passage in your favourite font on paper you would like to cut out from, making sure there is enough room above and below it to write the rest of the passage. (I chose the words “Juliet” “Romeo” and “Heaven”)
*If you have paper that can’t go through a printer, simply print the words on a plain piece of paper and then layer it with the piece you would like to cut out.
Next, cut the words out on a cutting mat with a scalpel knife. If you’ve layered the printed paper, make sure it’s on top of the paper you would like to use in the mobile so you can follow along those lines. Once you’re done, toss the cut out printed sheet or think of another craft project.
Next, you can punch a hole at the top of your passages or just thread the ribbon through the cut outs. If you would like to add some pop colours, just place colourful paper to the back of the kirigami cut out. (I used red behind my kirigami words to match the ribbon)
Finally, tie the ribbons to the dowel or bamboo and hang with a loop or a screw in hook at the top.

You can create home decor for yourself or give these as a gift for special occasions. Enjoy!
