
Adenture and the Northern Lights in Yukon Canada
Yukon is a territory of Canada and a neighbour of Alaska. Many people believe there is nothing but snow and ice, but there are actually many wonderful experiences to be had! Witness various wildlife in their natural habitat, enjoy the incredible views of the Northern Lights and feel excitement while taking in the landscape during a dog sled ride.
When visiting Canada, a trip to Yukon is a short plane ride away from Vancouver British Columbia. Being a popular holiday destination for people from Japan, there’s a group that offers travel packages from Tokyo to Yukon and back again: oce-center.org.


Craft City Guide – Toronto, Canada (Featured on Cut Out + Keep)
Hi All!
I just wanted to share with you my featured article about the crafty city of Toronto! Please check it out (here) and let me know what you think. I know I probably left out a lot, but it’s a good start for anyone new to the city.
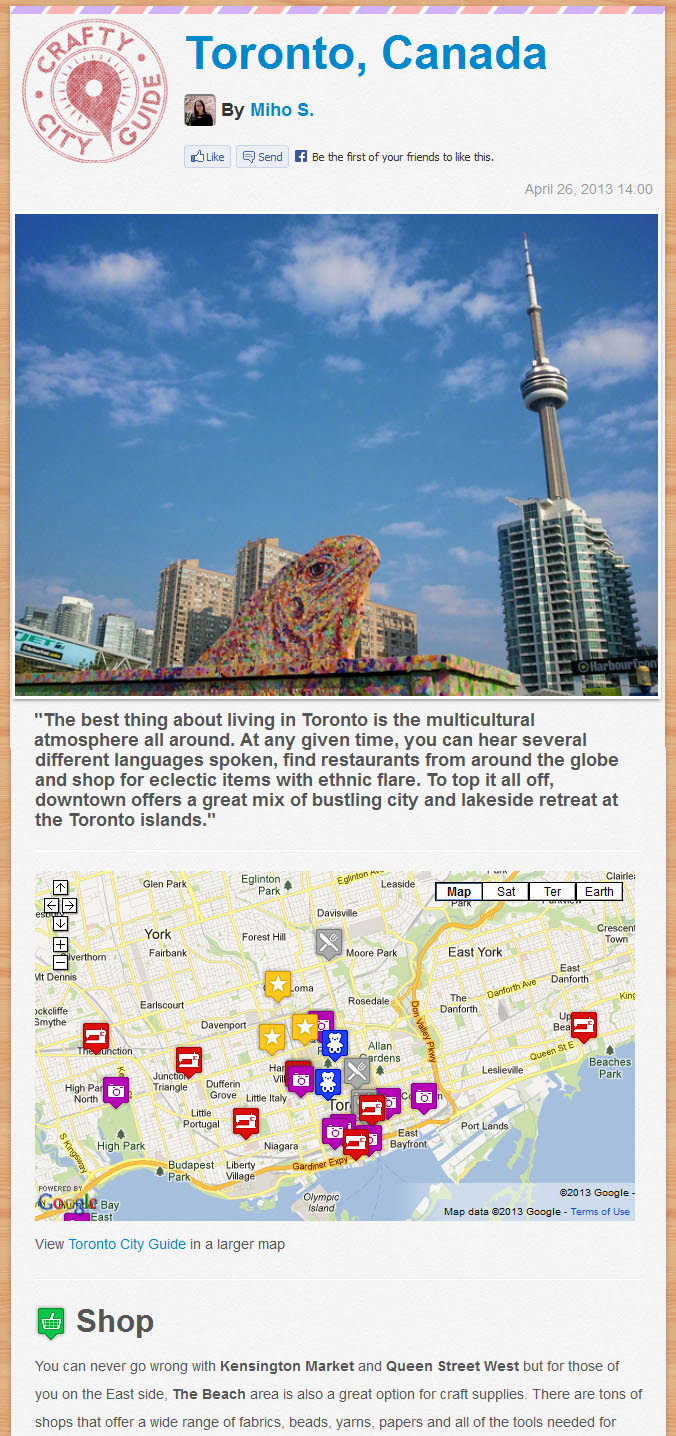
Click the photo to check out the full post on Cut Out + Keep!
Great Video: Alex Tindal: Moving Forward

Click the link below to watch the video
DIY Eco-Friendly Craft Projects for Families
By Scott Humphrey
When creating with kids, don’t worry about stocking the craft cabinet with art supplies purchased from the craft store. You don’t need to spend much money to provide kids with a well-rounded sensory experience. Instead of buying new paper at the store, save junk mail and used computer paper for kids to use in their art projects. Tin or aluminum cans should be recycled for hundreds of crafty activities. With some repurposed items, a few key supplies like glitter and rubber stamps and a healthy dose of creativity, you and your kids will be able to create imaginative and practical items.
Do you often find yourself recycling or discarding aluminum cans? Instead of throwing them out, reuse them to make practical herb or flower pots. Kids will be excited to grow their own flowers or plants, and they will love personalizing the can with colorful paper covered with designs imprinted by custom stickers.
Supplies
To create a unique miniature flower pot, you’ll need the following materials:
- An empty aluminium or tin can
- Nails or a screwdriver and a hammer
- Scraps of decorative paper or fabric
- Decoupage glue, such as Mod Podge
- A paintbrush or sponge-tipped applicator
- Rubber or self-inking stamps
- Paint, coloured pencils, crayons or markers
- Glitter (optional)
- Potting soil
- Herb or flower seeds

Instructions
- Thoroughly wash and dry the can or cans you intend to use. If there are any rough edges around the opening of the can, sand them to a smooth finish with a metal file. Create holes in the bottom of the can by pounding a nail or a screwdriver into the surface with a hammer.
- To enhance the earth-friendly appeal of this project, use recycled paper. You can use brown paper from grocery or lunch bags or wrapping or tissue paper saved from your last celebration. Instead of paper, you can even use scraps of fabric cut from clothing you’re planning on donating.
- Cut scraps of paper or fabric to fit around the can. You can measure and cut a rectangle to fit around the can perfectly or tear the paper into small pieces and create a collage. Decorate the paper however you wish. You can create colourful designs on the paper with rubber stamps or draw designs with markers, paint or crayons.
- To stick the paper or fabric to the can, spread a substantial layer of decoupage glue over the entire can. Smooth the paper or fabric over the can, and then coat it with another layer of decoupage glue. Continue to add scraps, layering them with glue, until you have achieved the look you want. For added flair, sprinkle glitter on the wet glue. Let the can dry for at least 24 hours.
- Once the glue has dried, fill the can with potting soil. Plant a few seeds in the soil and place the can in a sunny location. Water as needed and watch your new plant flourish. As a final touch, write the name of the plant on the outside of the can with paint.
- Personalized tin can pots make sweet arrangements, especially when a variety of sizes are combined. Combine 28-ounce tomato cans, 15-ounce cans of beans and cans of tuna to create interest. These look adorable lined up on a windowsill soaking up the spring sunlight or as a refreshing centrepiece for a dinner party.
