
Top 10 Crafting Books to Check Out – Part 2
Here is the rest of my craft book list that I think all creative people can enjoy:
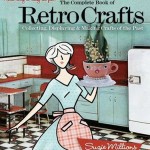 The Complete Book of Retro Crafts
: Collecting, Displaying and Making Crafts of the Past by Suzie Millions
Go retro with this book. Perfect for hipsters, baby boomers and those who love anything vintage and retro. You’ll surely love the projects that would bring back the glory days. Not only that, but this book also includes pictures and historical notes that would make you know more and understand the nitty-gritty of retro and crafts.
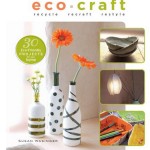 Eco Craft
: Recycle Recraft Restyle by Susan Wasinger
With all the problems and change brought about by global warming, wouldn’t it be great to create crafts while making sure that the planet benefits from your projects? Eco Craft is the perfect book for your goal. Not only would you enjoy making all the projects listed in the book, you’ll also be able to minimize waste and help save the environment.
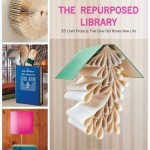 The Repurposed Library
: 33 Craft Projects That Give Old Books New Life by Lisa Occhipinti
We all love books, but there will come a time when you have to give some of your books away to free up some space for your new collections. With The Repurposed Library, you don’t have to throw or give away books. Transform your books into mobiles, wreath, vases, shelves and even a tablet/Kindle “keeper” for those who want to feel like they’re reading the book in its true form. You can even make these old books into decorative pieces for your home.
 You Are Awesome
: 21 Crafts to Make You Happy by Abbey Hendrickson
Doing something fun can make you feel happy and satisfied. You Are Awesome is a book of crafts that would make you feel happy without having to do anything drastic. Abbey Hendrickson is a popular blogger that would guide you with the step-by-step instructions of each and every craft in the book. Have fun and be happy.
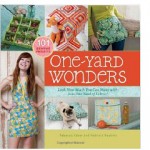 One Yard Wonders
: 101 Sewing Fabric Projects; Look How Much You Can Make with Just One Yard of Fabric! by Patricia Hoskins and Rebecca Yaker
With One-Yard Wonders, you’ll surely discover the wonders of sewing. Even if you are a newbie in the world of crafts and sewing, or an experienced seamstress, you’ll surely find the projects in this book easy and fun to do. As the book promises, you’ll be able to turn a yard of cloth into anything: accessories, jewelry, pouches, bags, baby items and even banners for all occasions.
Greeting Card Project: Chiyogami Puzzle Piece Embellishments
As you may know by now, I love Chiyogami.
I’ve made many different things with chiyogami and always keep little scaps in a box for later use. If you have scraps of decorative paper or just want to recycle some leftover paper, here’s a great greeting card project that anyone can do, for any occasion.
First, get a bunch of little scraps along with a large sheet of heavy cardboard paper.

Next, cut a trip measuring one third of the sheet.

The wider portion will become the envelop and the narrow one will be the card.
Cut the narrow piece in half. Fold one piece in half for the card and set the other half aside for later use.

On the larger piece, draw out the envelope template. I usually trace the outline of the card and add about 0.5cm to the sides. For the flaps, it’s easy to extend lines to the edges of the paper, but also making sure to make it about 1cm narrower at the edges.

Cut out the envelope shape. Make sure you only cut the outside lines.

Add wedges (dotted line) to the side flaps to make it easier to extract the card.

Fold along the lines and make sharp creases, then add double-sided tape to the sides of the bottom flap and fold it up to secure it to the side flaps.

Set the envelope aside and grab the remaining piece of cardboard that you have. Cut out any shapes you like.
I decided to cut out a simple rectangle and heart.

Cover the entire pieces with double-sided tape followed by scrap chiyogami paper.

On the reverse, draw out simple puzzle pieces.

Cut out the puzzle pieces.

Secure them to the front of the card in the rough shape, or…

scattered all over the card.

I decided to scatter all of the pieces except one for this card, because I wanted that one piece for the envelope.

To tie in the envelope, secure one puzzle piece to the closing flap. This is a nice way to make a closing seal and to make the receiver excited about what the card looks like.

Holidays are quickly approaching
With so many projects and jobs to do, I decided to take a little time off each week to sit down and do a little fun work, and prepare for the upcoming holidays.
I’ve decided to handmake everyones card and possibly some gifts as well.
So far, I’ve finished a set of winter snowflake cards that I hand cut with my dear scalpel knife.
Here they are:


Mini Book with Chiyogami Spine

I was feeling pretty stressed the other day, so I decided to leave my work and make something fun.
The end result is this cute little book make from blank note cards and a tiny scrap of chiyogami.


Let me know what you think about this project -write your comments below!
Simple Chiyogami Butterflies
")
Here is a simple tutorial to make butterflies.
I’ve used chiyogami and washi tissue, but any paper will do, as long as you have complimentary colours or a very nice contrast.
Here is the basic outline of the butterfly wings:
")
First, draw this shape on stiff cardboard to make your own template.
Then, outline the template on the back of any decorative paper you chose and cut it out.
***Make sure not to cut out two of the same side! Flip the template so they are opposing shapes.***
Finally, take the cut out wings and stick them on a fine tissue or any lighter material then cut around the wing shape, but larger than the originals to create an outline.
Example:
")
When you’re done, hang them in the window, stick them to cards or book covers, create puppets by sticking them to popcicle sticks, or even try to do the same thing with fabric!
")
