
New Project Brewing…
As many of you may already know, I’m one of those people who can’t throw certain things away. I wouldn’t call myself a hoarder because I fairly regularly clean house (toss, donate, give away), but there are so many things that I know I can recycle or repurpose as a craft project. The main problem is that I never get around to actually making any of these wonderful crafts…. hence the pile up of boxes, bags and other random objects. It has become my crafting Everest.
In order to use up most of my mountain, I’ve decided to make a children’s play castle. I have lots of different ideas for this project, so I’ll have to create a general plan to stay on track, otherwise it may become the never ending castle craft.
Here are some of the materials that I have to work with:
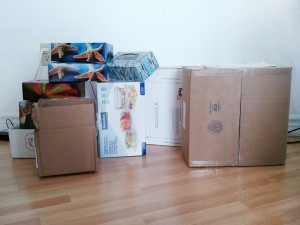
The majority is empty mail boxes, tissue boxes and I’ll add a few scrap cardboard paper and fabric for the finishing touches.
I’ll try to post my progress when I can and please send over your suggestions for making it better/different!
![]()
Can Candy Making Kits be Educational?
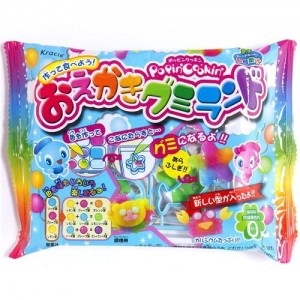
I have subscribed to RRcherrypie on Youtube and can’t help but watch through all of the videos just to see how all of the different candies are made. When I lived in Japan, I noticed all of these different candy making kits but never thought to buy them since they are for kids, but the more I see how fun they are, I realize that I’ve missed opportunities to teach my old class something educational from something fun.
Each candy making kit can easily be a fun science lesson for children of all ages. You can show them how a combination of a powder and liquid can form a solid, you can show colour changes by mixing different colours, teach them to be patient and precise when combining mixtures and you can get the kids excited about making their own “food”.
Luckily, it’s not just restricted to people living in Asia. You can find the same candy making kits on Amazon, I’ve linked to a list here.
If you would like to see just what I’m talking about, here’s one of RRcherrypie’s videos:
Free Printable Alphabet Worksheets from AnimalAdventureBook.com
Just finished putting up some more free printable worksheets on AnimalAdventureBook.com.
If you know a little one who loves animals and would like to practice their writing skills… or just need something to occupy the young ones while out, please check out the site (by clicking the photo below).
I would also appreciate to hear what you think about the current site, so if you would please give me some feedback in the comment section below, I can then make the site better for the children 😀

One Good Thing A Day – Project Day 44 – Planting Day and Kirigami
It was such a beautiful day that I decided to plant new flowers.
So far, I planted lavender, carnations and an unknown mix of what could be posies (?)
It was a lovely time out and I hope they can grow well. The only problem is I’ll have to find a suitable home for them when I move.
To continue with the flower theme, here’s an example of a nice kirigami cut out you could try just by folding one piece of paper in half:

Greeting Card Project: Chiyogami Puzzle Piece Embellishments
As you may know by now, I love Chiyogami.
I’ve made many different things with chiyogami and always keep little scaps in a box for later use. If you have scraps of decorative paper or just want to recycle some leftover paper, here’s a great greeting card project that anyone can do, for any occasion.
First, get a bunch of little scraps along with a large sheet of heavy cardboard paper.

Next, cut a trip measuring one third of the sheet.

The wider portion will become the envelop and the narrow one will be the card.
Cut the narrow piece in half. Fold one piece in half for the card and set the other half aside for later use.

On the larger piece, draw out the envelope template. I usually trace the outline of the card and add about 0.5cm to the sides. For the flaps, it’s easy to extend lines to the edges of the paper, but also making sure to make it about 1cm narrower at the edges.

Cut out the envelope shape. Make sure you only cut the outside lines.

Add wedges (dotted line) to the side flaps to make it easier to extract the card.

Fold along the lines and make sharp creases, then add double-sided tape to the sides of the bottom flap and fold it up to secure it to the side flaps.

Set the envelope aside and grab the remaining piece of cardboard that you have. Cut out any shapes you like.
I decided to cut out a simple rectangle and heart.

Cover the entire pieces with double-sided tape followed by scrap chiyogami paper.

On the reverse, draw out simple puzzle pieces.

Cut out the puzzle pieces.

Secure them to the front of the card in the rough shape, or…

scattered all over the card.

I decided to scatter all of the pieces except one for this card, because I wanted that one piece for the envelope.

To tie in the envelope, secure one puzzle piece to the closing flap. This is a nice way to make a closing seal and to make the receiver excited about what the card looks like.

