
Banana Coconut Cake Recipe
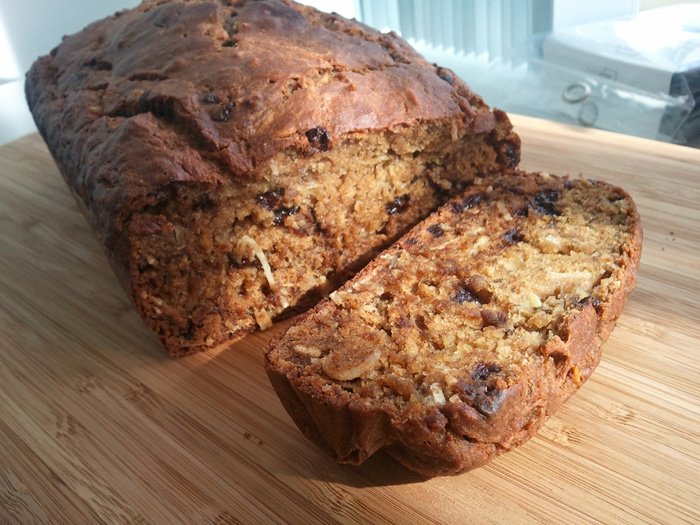
banana coconut cake
As usual, we bought too many bananas and some of them were getting a little too ripe to eat on their own, so I decided to make a banana cake. Since I was feeling a bit tired of standard banana cake, I decided to throw in a few more ingredients to make it a little different. I checked the kitchen to see what I had on hand and managed to find mini dark chocolate chips and shredded coconut. I thought to myself, why not?
I was happy to find it tasted great! The flavours and textures mixed well, not to mention it seemed to turn out lighter than standard cakes. I liked it so much that I’m sharing the recipe with you 😀 Enjoy!
Banana Coconut Cake Recipe
Bake at 350F for approximately 1 hour
Ingredients:
2 cups flour
1 teaspoon baking soda
1 teaspoon cinnamon
½ teaspoon salt
½-¾ cup cane sugar
¼ cup coconut sugar
2 eggs
½ cup vegetable oil or shortening
1 teaspoon vanilla
2 tablespoons milk (you can substitute almond milk as well)
3-4 tablespoons shredded coconuts
3-4 ripe bananas
Simplified Procedure:
1 – Mix wet ingredients together in one bowl (mash bananas into the mix).
2 – Add sugar to wet ingredients and mix until dissolved.
3 – Sift and mix dry ingredients in a second bowl.
4 – Combine wet ingredients with dry ingredients.
5 – Place batter into a cake pan and bake for 1 – 1½ hours. Pierce the cake with a skewer to make sure it comes out clean. When it does, the cake is done!
Craft City Guide – Toronto, Canada (Featured on Cut Out + Keep)
Hi All!
I just wanted to share with you my featured article about the crafty city of Toronto! Please check it out (here) and let me know what you think. I know I probably left out a lot, but it’s a good start for anyone new to the city.
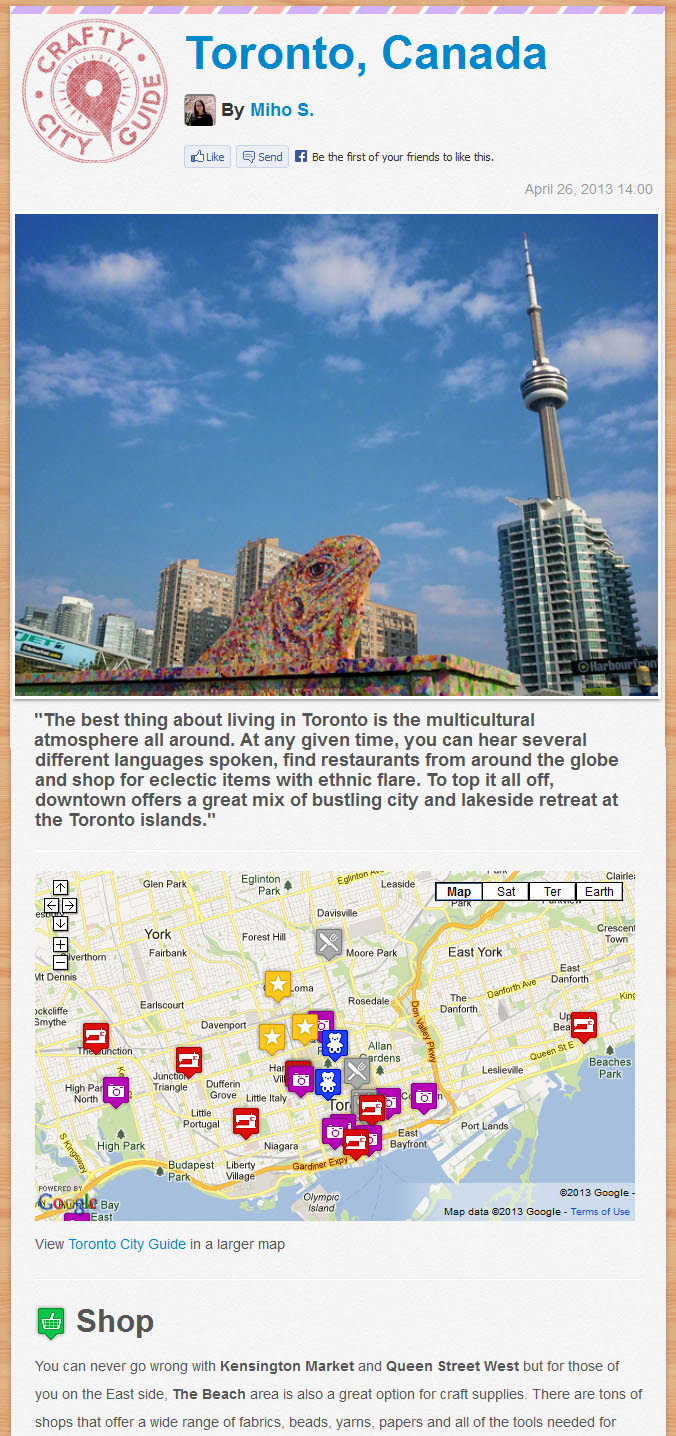
Click the photo to check out the full post on Cut Out + Keep!
How to Use a Gum Wrapper for Cards or Decorations
I’ve always loved gum wrappers because they tend to have pretty designs and interesting textures that make them perfect for different craft projects. You can make any number of origami designs or even try something even easier.
Simple Waves
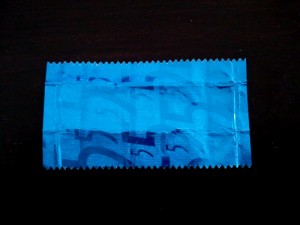
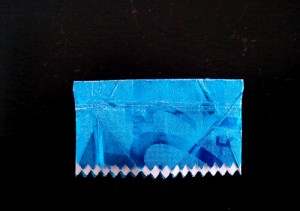
Start off by flattening out the paper.
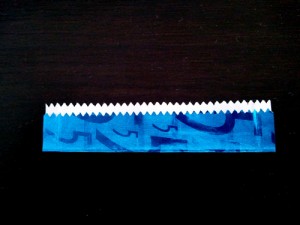
Fold one side up, but not quite to the very top. This will leave a bit of the white paper showing for contrast.
Get some plain card stock or a standard piece of paper folded in half.
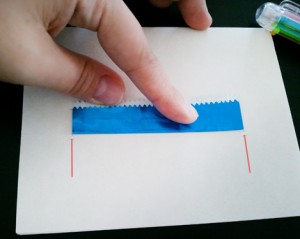
Measure out the width of the gum wrapper (as marked by the red lines). This will create a slit for the wrapper to sit in.
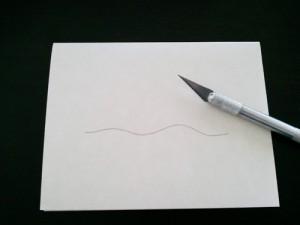
Draw a wavy line from one point to another and cut it out with a scalpel knife.
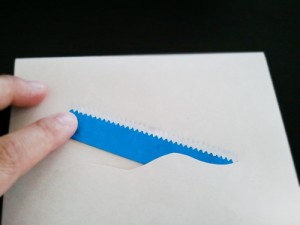
Slip the wrapper in the slit and secure it with a little glue or double-sided tape.
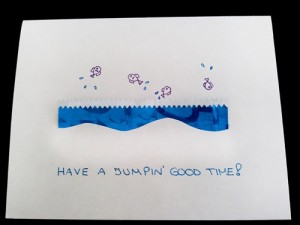
Add some special details like jumping fish or a beach scene and you’re done!
Skirt
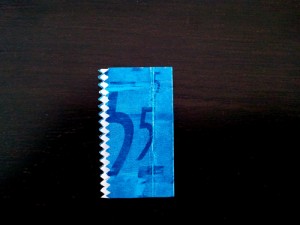
Start off with the wave fold and turn it on its side. Fold it in half width wise.
Fold in two corners on a diagonal, making one side narrower than the other.
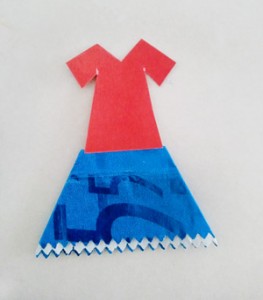
Flip it over and there you have a simple skirt. This is a great idea for inexpensive paper doll clothes.
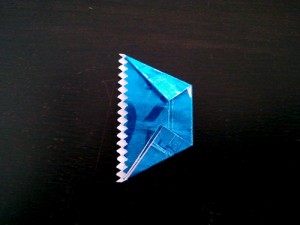
Mountain
From the base fold used for the skirt, take the opposite corners and fold them in to the middle. This time, make sure one end is much wider than the other.
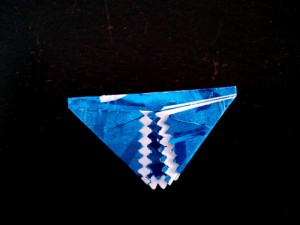
Secure the back with tape or glue and flip it over.
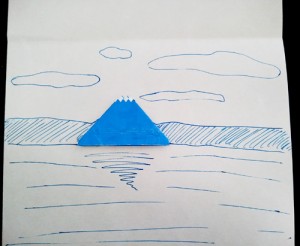
Now you have finished a simple snow-capped mountain! Perfect for paper scenes in frames or on cards!
![]()
Crafting Budget – How Much Do You Spend on Crafts?
I love being creative and making something fun from random materials that anyone can get a hold of. These days, I try to get free or inexpensive materials for creative projects just for fun. If you missed my previous posts about finding free crafting materials from around the house, please take a look at them and let me know if there is anything that I’ve missed.
 While I do try to keep my budget low for crafting, there will be times when I will splash out on quality tools or materials that I know will go a long way. This is especially true for scalpel knives, paper cutters and writing utensils.
Over the years, I’ve certainly piled up quite a collection of paper, paints, adhesives and stationery. Most of my cost went into Japanese chiyogami and washi but I only use them for “special” occasions *^_^* Although everything takes up more space than I prefer, I try my best to keep it neat and organized… so I don’t forget what I have!
I believe that being creative should not have to be expensive, whether it’s just for fun or as a special gift. Also, many people seem to miss the point that crafting shouldn’t be terribly expensive. No matter your skill level or style, it’s possible to make beautiful things that you and others love as well.
That being said, I’m curious to know how much you spend on crafts in a year?
How to Make Fun Candy Garlands from Paper Scaps!
I still have TONS of paper scraps that I want to use, but didn’t have fun ideas for it -until now!
Here is a cute paper craft to make a paper garland that looks like it has a bunch of strung up candies without the sticky mess or the temptation!
Get out your scraps of paper -any will do. If you have different weights and textures, they can add nice depth when you’re finished.
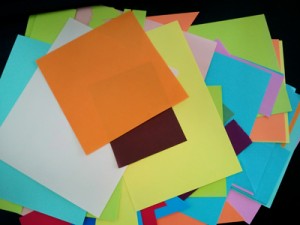
scrap paper pile
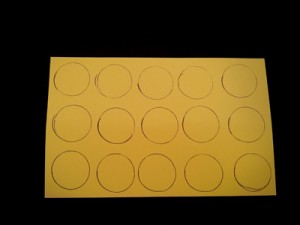
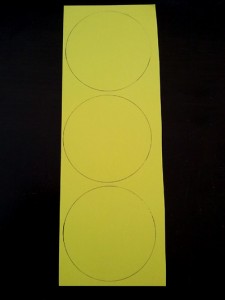
Grab one piece of paper and draw out a bunch of circles (I used the middle of a plastic tape dispenser as my circle template.
Draw out simple shapes.
Find a good contrasting colour to make the wrapped candy tips. Make sure to measure the diameter of the circle as the long middle so it’s easy to tape to the back of the circle.
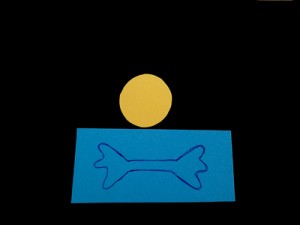
Measure the width to sketch out the candy tips.
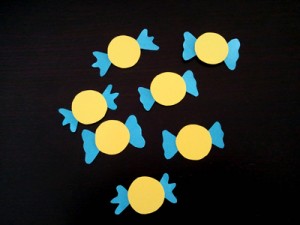
Completed mini candies.
For large lollipops, draw out larger circles just like the little wrapped candies.
Draw out larger circles.
Choose several different colours to combine contrasting ones for each lollipop.
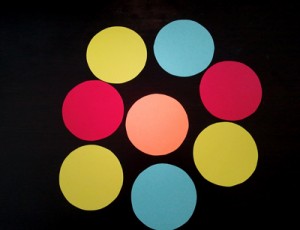
Choose several colours for variety.
Choose one colour as the base and one as the top swirl. Take the top colour and cut out a swirl. To do this, just start cutting at one point and follow the circle until you reach the middle.
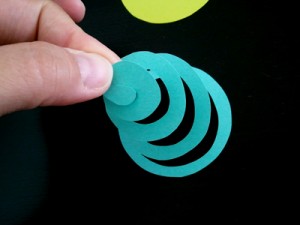
Cut out a swirl.
To make the swirls thinner, cut along the middle of the strip and cut all the way through the middle. This should now give you two thinner swirls. You can use both swirls for lollipops or use one swirl for other hanging decorations.
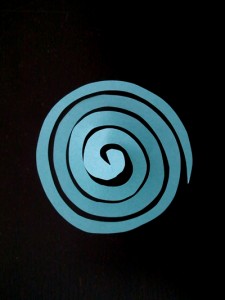
Thin out the swirl by cutting along the swirl in the middle.
Glue the swirls down on the plain circles for the lollipop top. Cut out a few sticks and just tape them to the back.
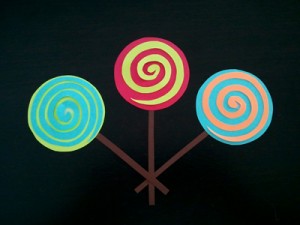
Tape or glue on top of plain circle.
For simple mini heart lollipops, cut out small heart shapes and tape short sticks to the back. Simple!
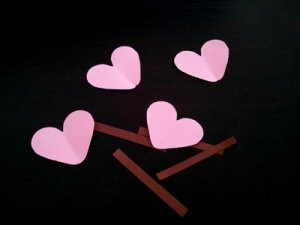
Hearts and sticks from scraps of paper.
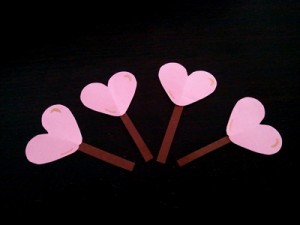
Attach the sticks to the back of the hearts.
I found these fun bright colours and just started cutting out rectangles and trapezoids (essentially a triangle with a cut tip).
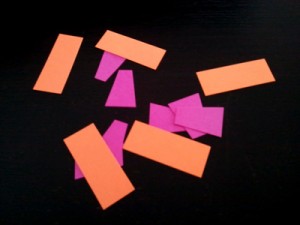
Rectangles and trapezoids from scraps.
Glue the trapezoids to the ends of the rectangles to make a simple type of rectangular wrapped candies.

Rectangular candies.
For smaller scraps of paper, try to pair up shades of long thin rectangles together for candy sticks.
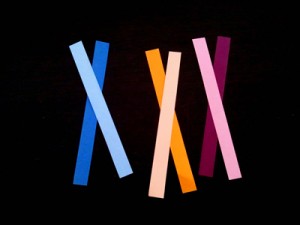
Pair up shades for candy sticks.
Take the lighter shades and cut out diagonal strips (width wise). Discard every other strip and glue the rest on the darker strip.
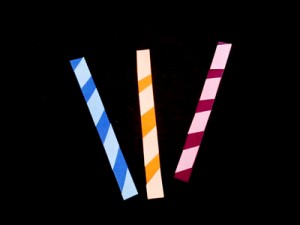
Finished candy sticks.
Once all of the candies are done, arrange them as you like along a string or ribbon. I like to arrange them close together so that the string is barely visible.
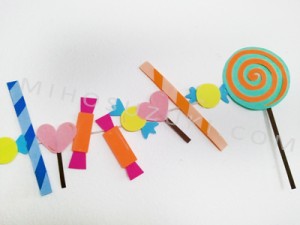
Arrange paper candies however you like.
Finished! Isn’t it adorable? I think it’s a great decoration for Birthday parties, children’s play dates, or even just to dress up the house with something colourful and fun!
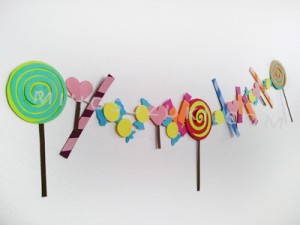
Finished paper candy garland!
Let me know what you think and please send me your variations so that I can feature them on the site!
![]()
