Guest Post: A Magicians Creative Process
I’m a professional magician and my job is to make the impossible look easy. When I perform people often ask me about the creative process for creating a brand new magic trick and although you guys may not be magicians I think there are some lessons for others in the process I go through.
I always carry a notebook to scribble ideas in. I have a smartphone and could use the notes function but I don’t seem to be able to “creatively freewheel” when I am typing. A notepad is meant be messy and it also allows me to flick through the book so old ideas can be built on easily. A smartphone is a great tool but I much prefer to go old school when developing ideas.
I don’t start looking for new magic routines, I’m always looking for possible ideas and the germ of an idea can come from any aspect of life. A lot of my magic stems from pop culture like music, movies and celeb culture so this is the easy bit. I watch and enjoy all these things as I would do normally and once in a while the flicker of an idea will come.
For example recently I was being unproductive on facebook and the hit movie The Social Network was in the back of my mind. I made the small but essential creative leap that maybe, in my twisted world, the “first facebook” was really a book of faces with hand drawn information and curving arrows could be the links between different people. This sounded like a fun prop but it wasn’t enough so I made a note in my notebook and a note in my smartphone to look at this in one month.
A magic trick comes in two parts, method and presentation and my constant focus is to produce creative solutions to both. Obviously a magician never reveals his secret but I will tell you that magicians have been creating magic tricks for thousands of years and there are hundreds of books on the subject. It’s important to be well read on any subject you wish to be creative in. We are all standing on the shoulders of giants in our respective industries so use that knowledge.
I don’t force the creative process. Once I have made a note of idea and brain stormed for a few minutes I will leave it. I always come up with my best ideas when I am trying to fall asleep so if you can’t solve a problem then head to bed 30 minutes early and as you lie there trying to drift off the unconscious brain will be working overtime trying to help. This is where it’s essential to always have a notepad by your bed as you have no idea when inspiration will come to the fore and I guarantee you’ll have forgotten in the morning.
If you want to be creative you must always be thinking. Every sight, sound, moment of the day can be a solution so keep your eyes open and always be thinking, creativity doesn’t live in a vacuum so get out there and do things, let your mind wander. The more you practice trying to be creative the more successful you will be. Everybody has a creative mind it’s just in some people it’s an underused muscle and needs to be retrained.
Hopefully this gives you an idea of the creative process of magicians and gives you some ideas you can use yourself for thinking creatively.
About the Author
Noel Qualter is a very experienced magician Surrey and magician Hampshire but performs throughout the UK at parties, weddings and events.
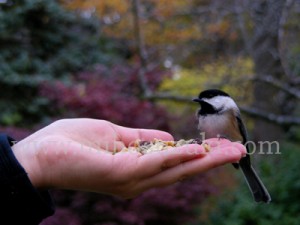
One Good Thing a Day – Project Day 79 – Autumn Colours
Sorry this is late but here are some photos showing you the beautiful Autumn colours that I absolutely adore!
One Good Thing A Day – Project Day 78 – Nature Contrast
- Tokyo and Toronto
By now everyone should know that nature is not so abundant in Tokyo as it is in Toronto. One of the main reasons for this is the fact that Toronto has about one sixth the population that Tokyo does and Toronto in general offers more living space per person than Tokyo does.
While I have posted some nature photos from Tokyo in the past, it’s certainly not the same.
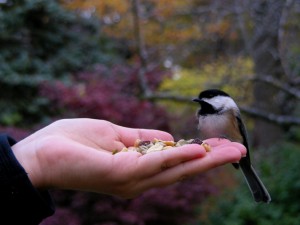
Here are some from Toronto:
Thank You!
Thank you for The Tokyo Fashion Guide support link market!
We really appreciate it!
For those of you still unaware of what this support is for, check out this post.
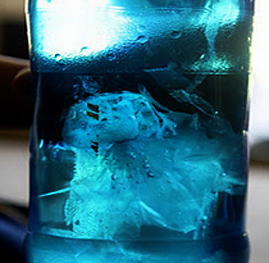
How-to Guest Post: Jellyfish in a Bottle
Great simple project for preschool and older. Love the simplisity and beauty of the end result.
This post is from Neltje Maynez showing us how to make Jellyfish in a Bottle:
It was a rainy day last week, and my kids were going absolutely crazy. They had the day off from school, but they couldn’t go outside. They were stuck in the constraints of the house. I was going out of my mind as well. It’s been a long time since I have had my kids in the house. I knew I had to find something for them to do—if I didn’t—we would all be in trouble. That’s when I was excited to start a project that I wanted to do: jellyfish in a bottle!
And, I had everything that I needed to make it at home! If you are having a rainy day with the kids, try this project!
What you need:
1. A transparent plastic grocery bag
2. Plastic water bottles.
3. Thread
4. Food coloring—preferably blue
5. Scissors
Procedure:
First, get your kids to flatten the plastic bags that they want to use as the “jellyfish”.
Second, cut the sides of the plastic bag so that the bag is split into 2 sheets. You will end up only using one of the sheets.
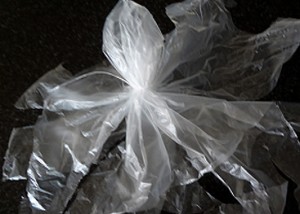
Third, fold the center of the plastic bag, almost like a tiny balloon so that you can make the head part of the jellyfish. After you make the head, tie it with the thread. Don’t tie it too tight. If you have really little ones, you can help them with this step.
Once you have the head part, the rest of the “jellyfish” are the tentacles. You will have just about 7-10 tentacles.
Help the kids trip the tentacles. Make sure that you have a different length for the tentacles.
Now you are ready to put the jellyfish in the water!
Put some water in the jellyfishes head—it will help it sink into your bottle. (But make sure not to fill the head all the way—it needs to be able to float to the top)
Then fill up your water bottle, then about 2 drops of food coloring!
Your kids now have a jellyfish in a bottle. (And you just bought yourself about 2 hours of quiet time).
This is the finished product:
Thank you to Neltje Maynez from mycollegesandcareers.com for the great post!


